How to Install JIBB Room on a Cisco Device (Room OS)
This guide walks you through installing the JIBB Room App on Cisco Room Series devices using the JIBB Admin Portal.

1. Compatibility Requirements
Please make sure you check all of the following details before you start installing JIBB Room on your Cisco Device:
Visit the Login Page:
- Open your web browser on a desktop connected to the same network as your Cisco Device and go to https://app.jibb.ai/.
- If you see the login page, proceed to Step 1. This indicates that your network allows access to JIBB Room, but it does not confirm full accessibility.
- If you see a blank or error page, this could mean that your network settings, including firewalls or proxies, are blocking access to JIBB Room.
Access Developer API Tab in Local Device Controls:
- Log in to Webex Control Hub.
- Local Device Controls for the device you want to install JIBB Room onto.
- Inside Local Device Controls, click on the Developer API tab.
Execute the following API Command:
“xCommand HttpClient Get ResultBody: None Url: https://app.jibb.ai/”
Interpret the Results:
- A message showing "1 of 1 applied successfully" with a green tick signifies that your network isn't blocking JIBB, and you can proceed with the installation of JIBB room.
- A response of "some commands were rejected" suggests that JIBB is likely being blocked by your firewall or proxy settings.
If either Step 1 or Step 2 indicates that JIBB Room is being blocked:
- Whitelist Essential Domains:
- Ensure the following domains are whitelisted in your firewall and proxy settings to allow smooth operation of JIBB Room on your network:
- https://app.jibb.ai/
- https://api.jibb.ai/
- If you're not sure how to adjust these settings, contact your IT administrator:
- Provide them with the domains listed above and request that they ensure these are not blocked by your network’s firewall or proxy.
1.1 - Device Operating System Requirements
Key Points to Ensure Compatibility:
- Latest Software Versions: Ensure your device is updated to the latest version of Room OS for optimal performance and compatibility.
- How to Check: In Control Hub under Devices > Software, you can see the different channels and how many devices in your organization are on which channel.
1.2 - Network Settings & Device Admin Credentials
Whenever you want to install JIBB Room on a device or update the App's configuration, please ensure you are connected to the same network as the device.
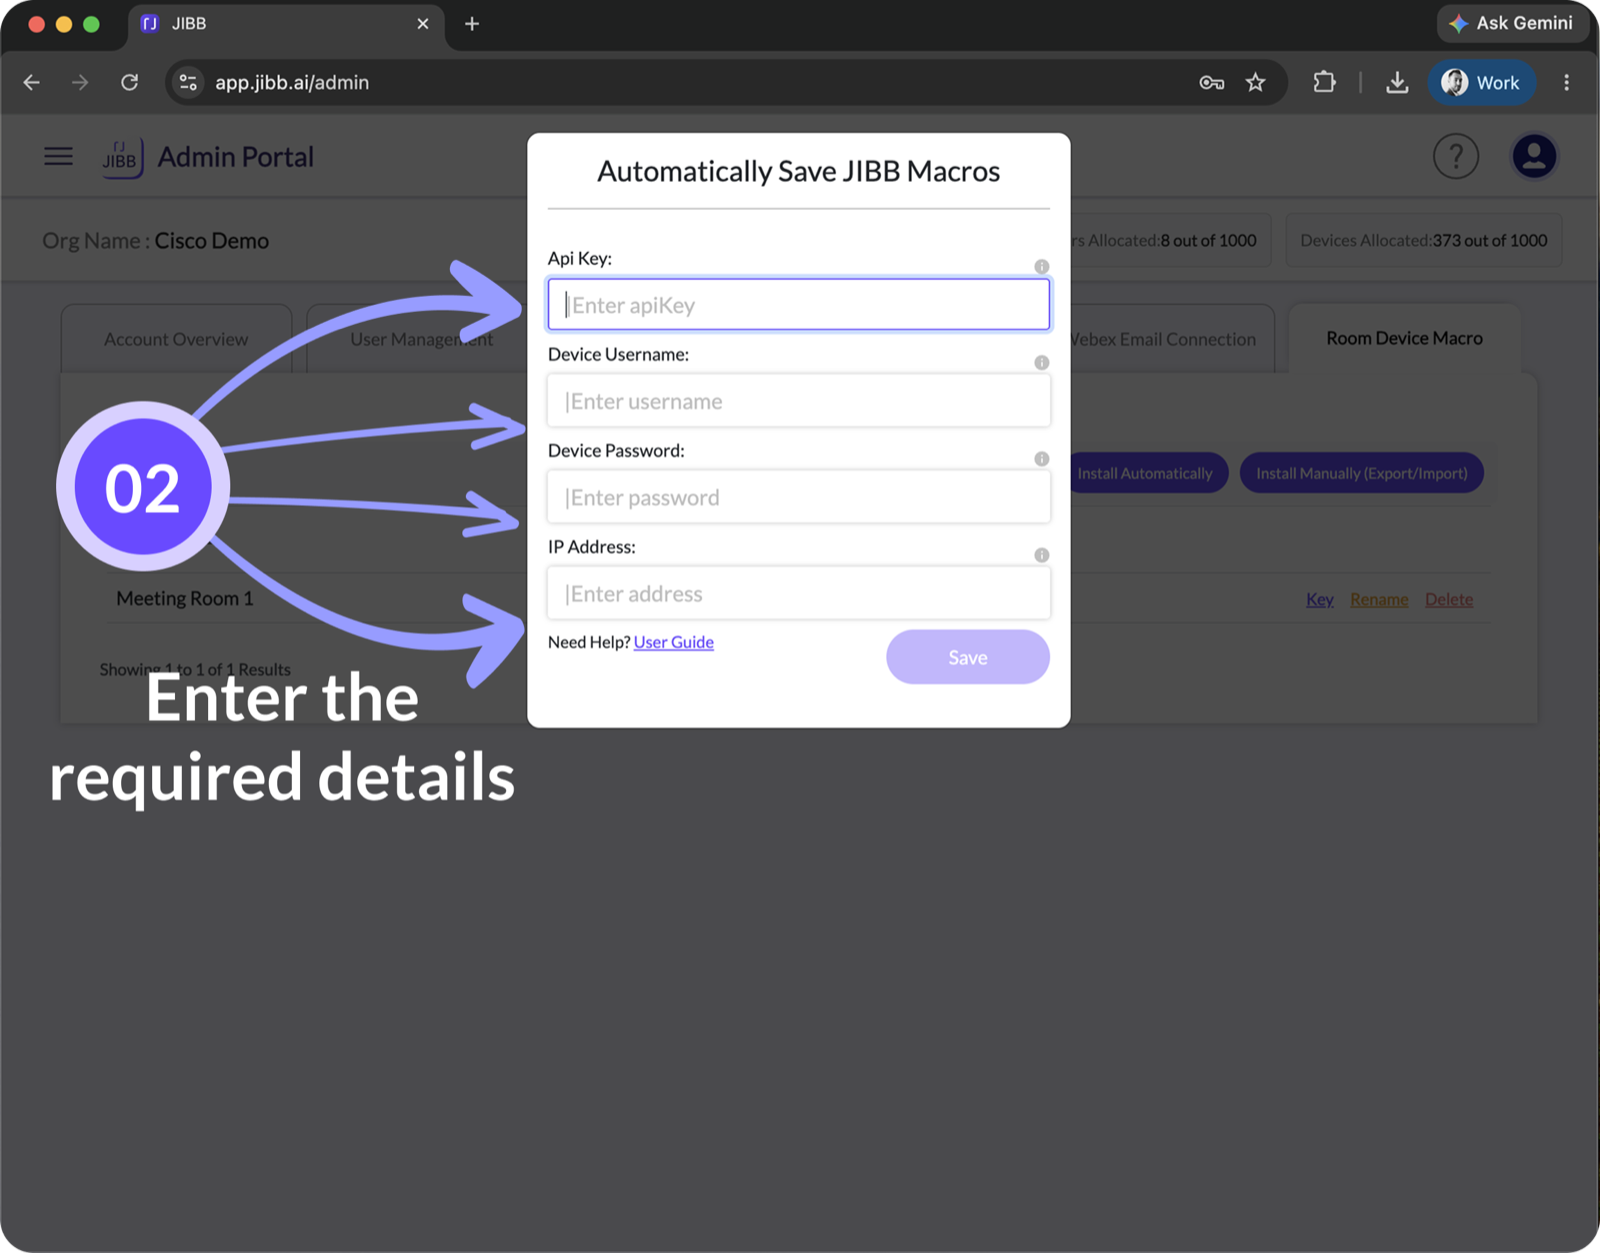
You also need to have access to an active device admin username and password/passphrase, the device's IP address, and a valid JIBB Room license API key (more info below).

Accessing & Managing Local Device Usernames & Passwords:
You need an active local device admin username and password to install JIBB Room onto your Cisco device.
Confirm you have an active local admin username, password, and IP address for your Cisco device, and you're connected to the same network as the device. This step is crucial for a smooth installation.
To access, create, or update a local user with an active admin role for your device, follow these steps:
- Log in to https://admin.webex.com.
- Go to Devices and select your device in the list.
- Launch Local Device Controls and go to Users.
- Add a new user and assign the admin role and set the status as Active.
2. Installing the JIBB Room App
Once you have checked the compatibility requirements above, you're ready to start installing JIBB Room onto your Cisco Room Series Device.
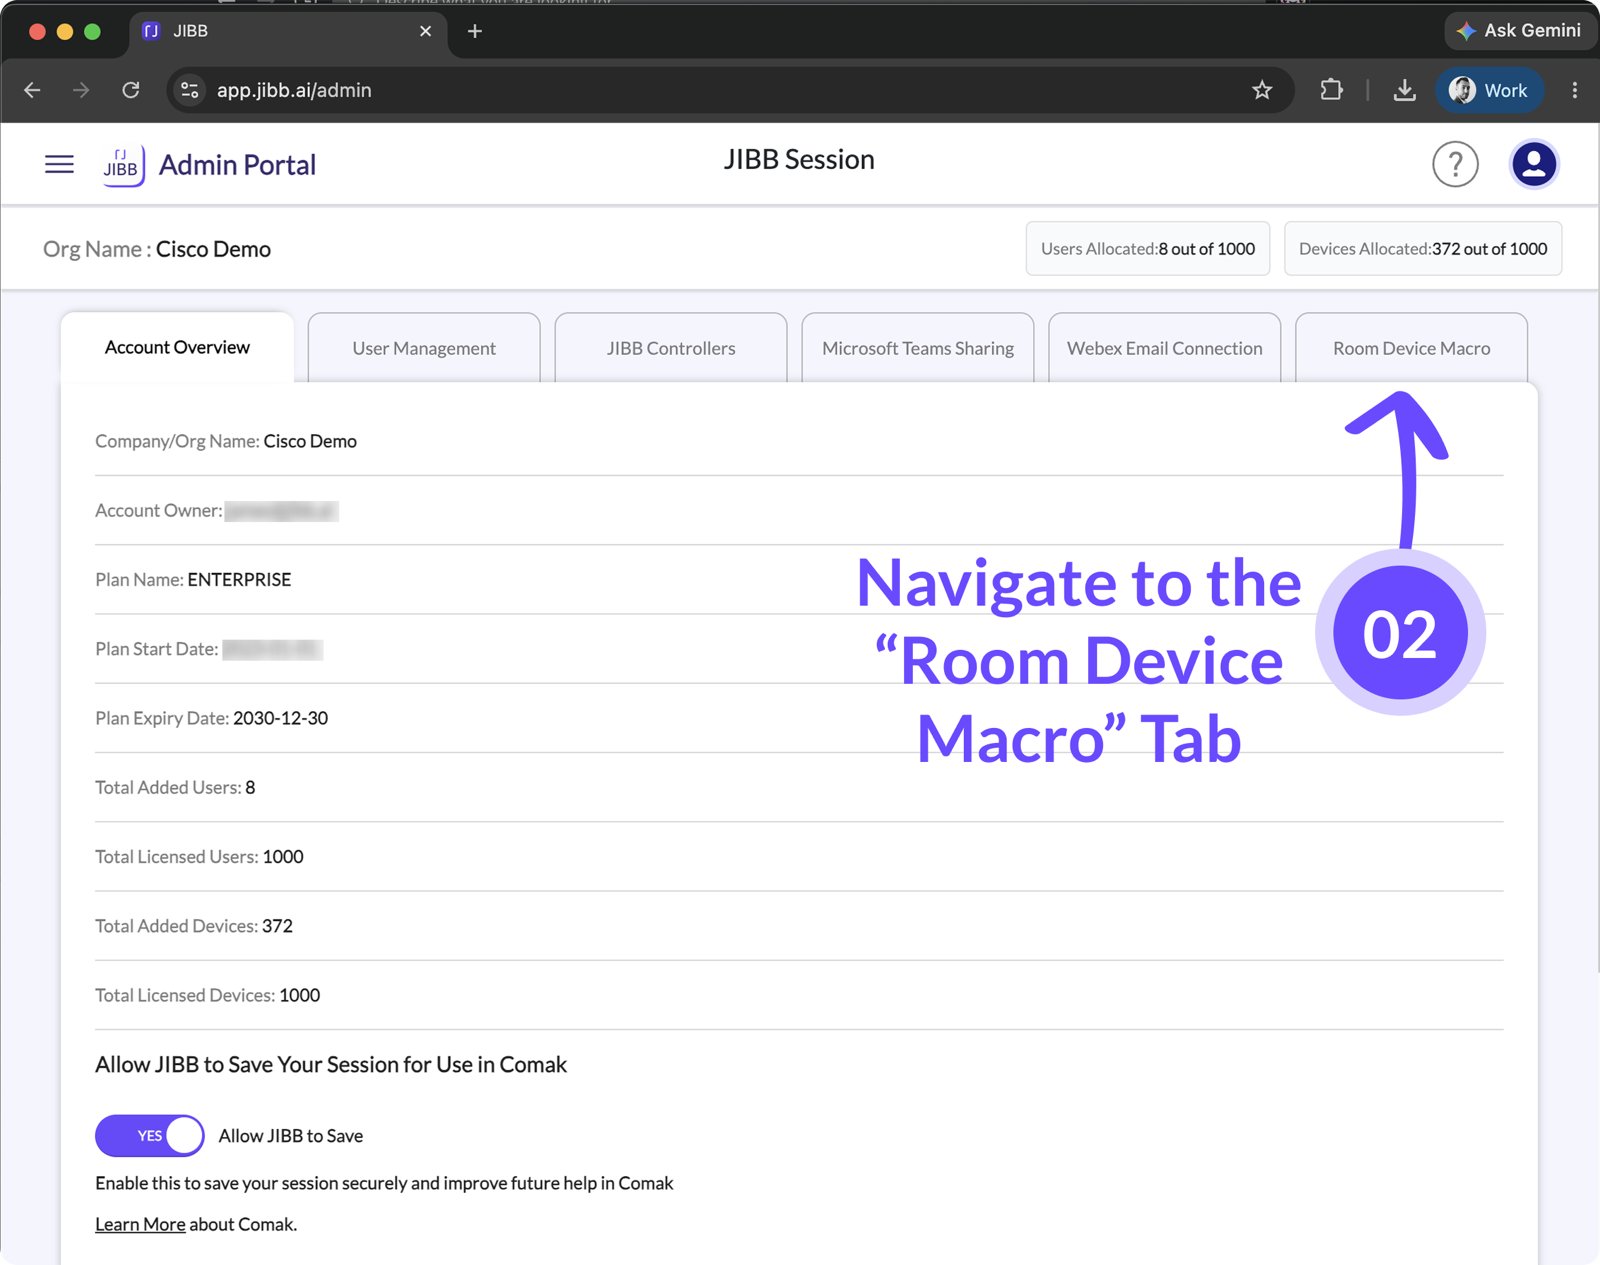
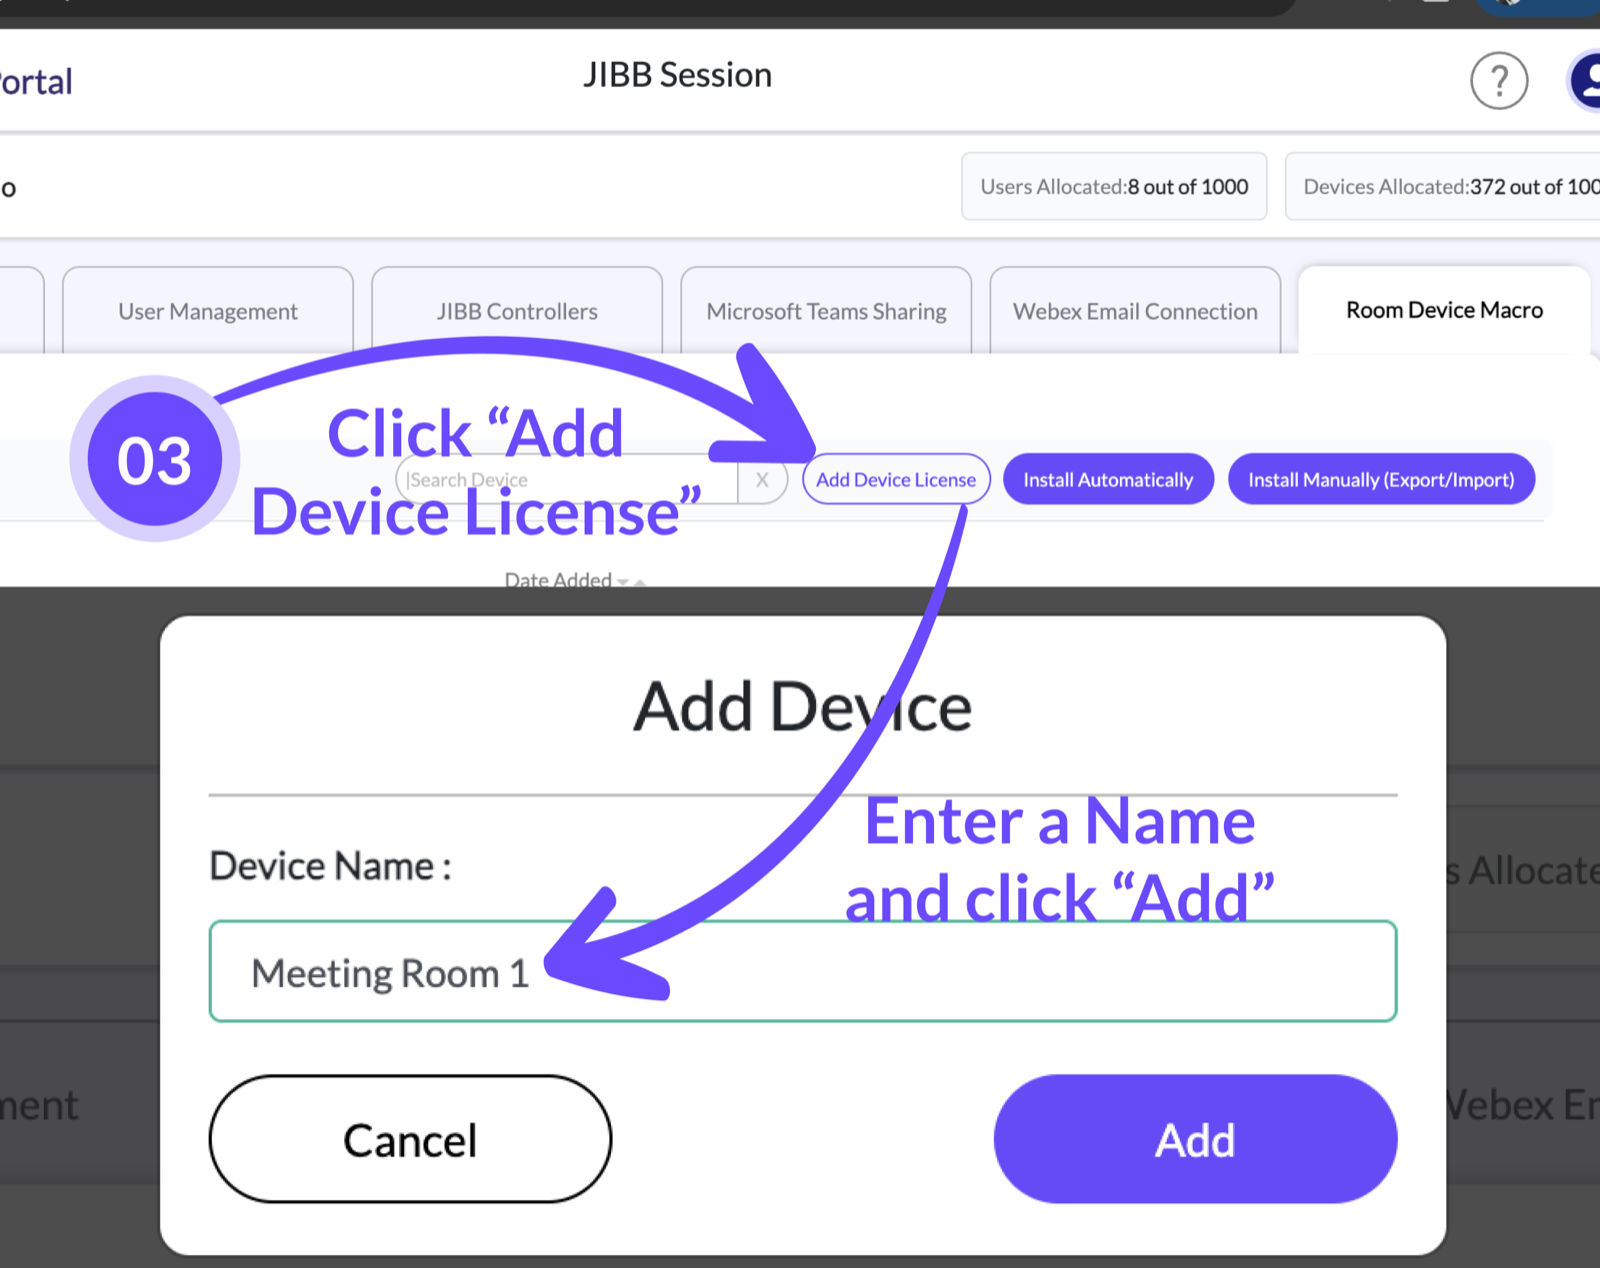
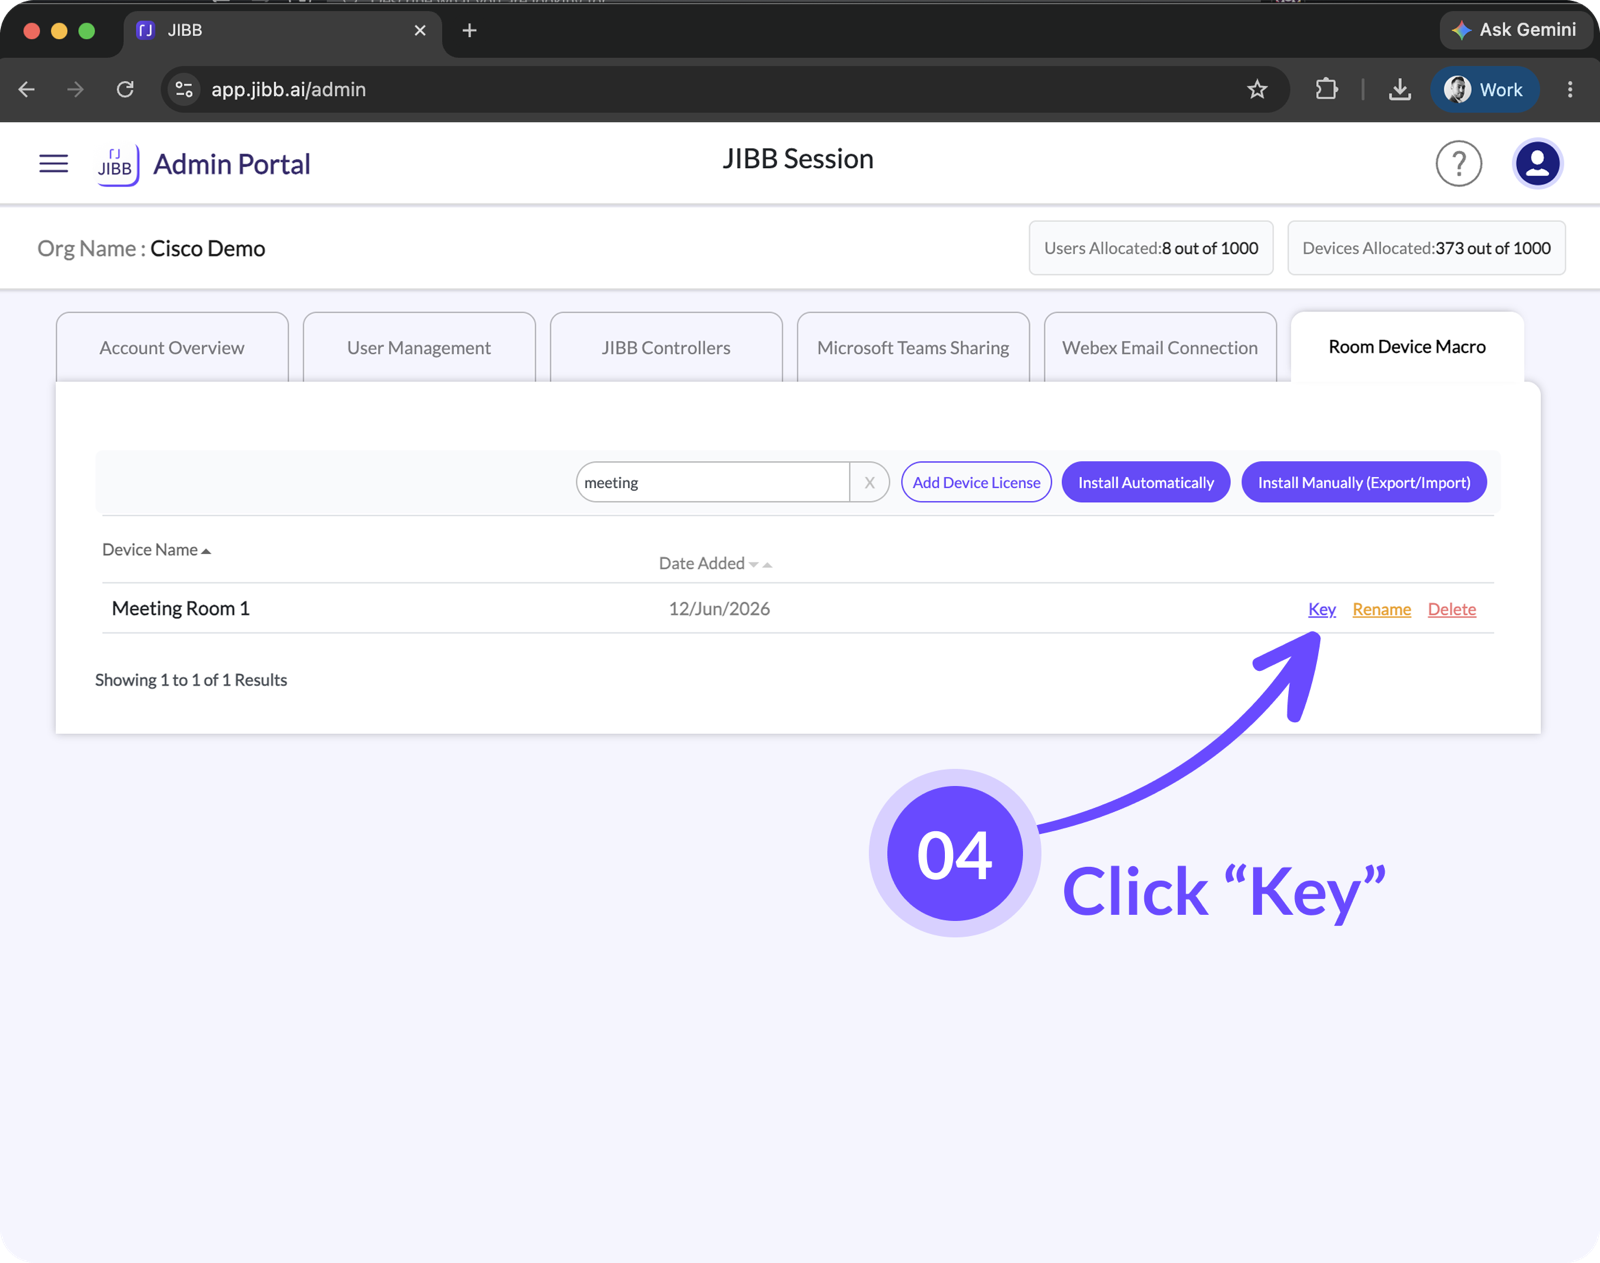
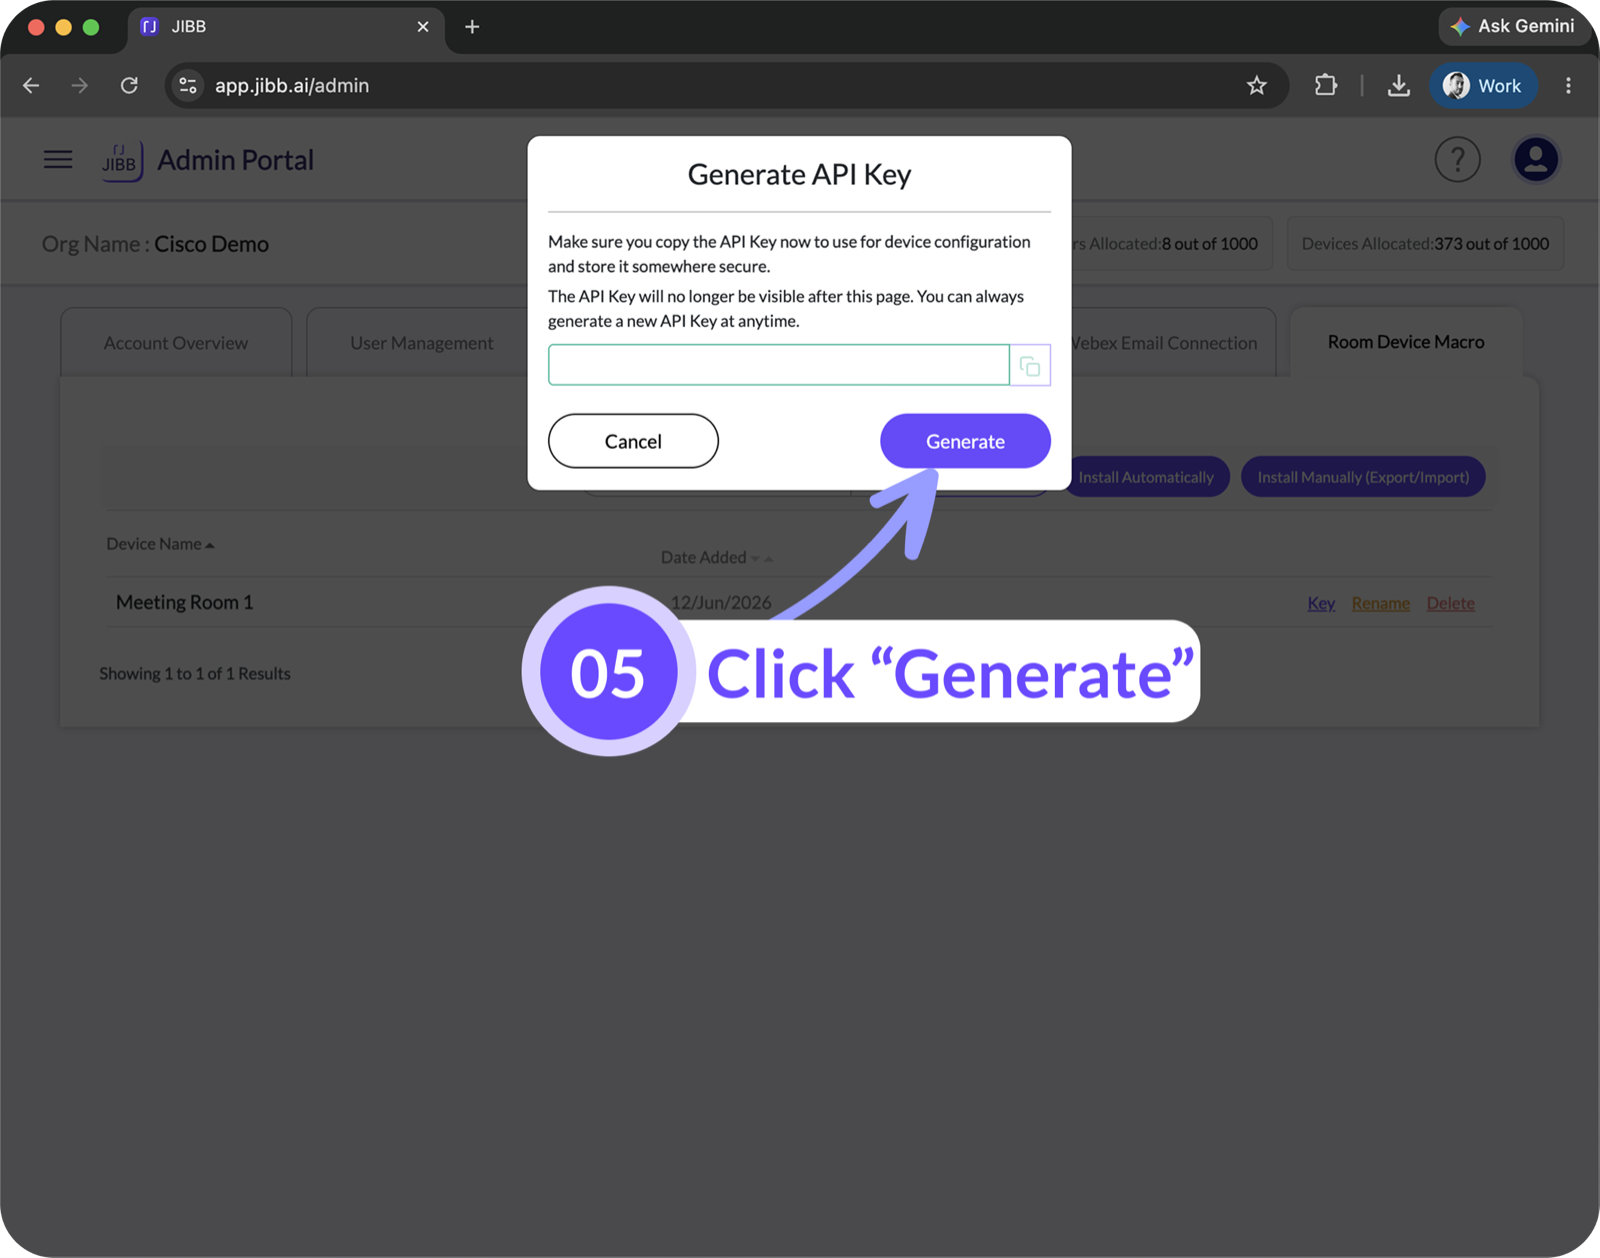
Please follow the instructions below to log in to the JIBB Admin Portal, add a Room device license, generate an API Key, and install the JIBB Room Macro on your Cisco Device:

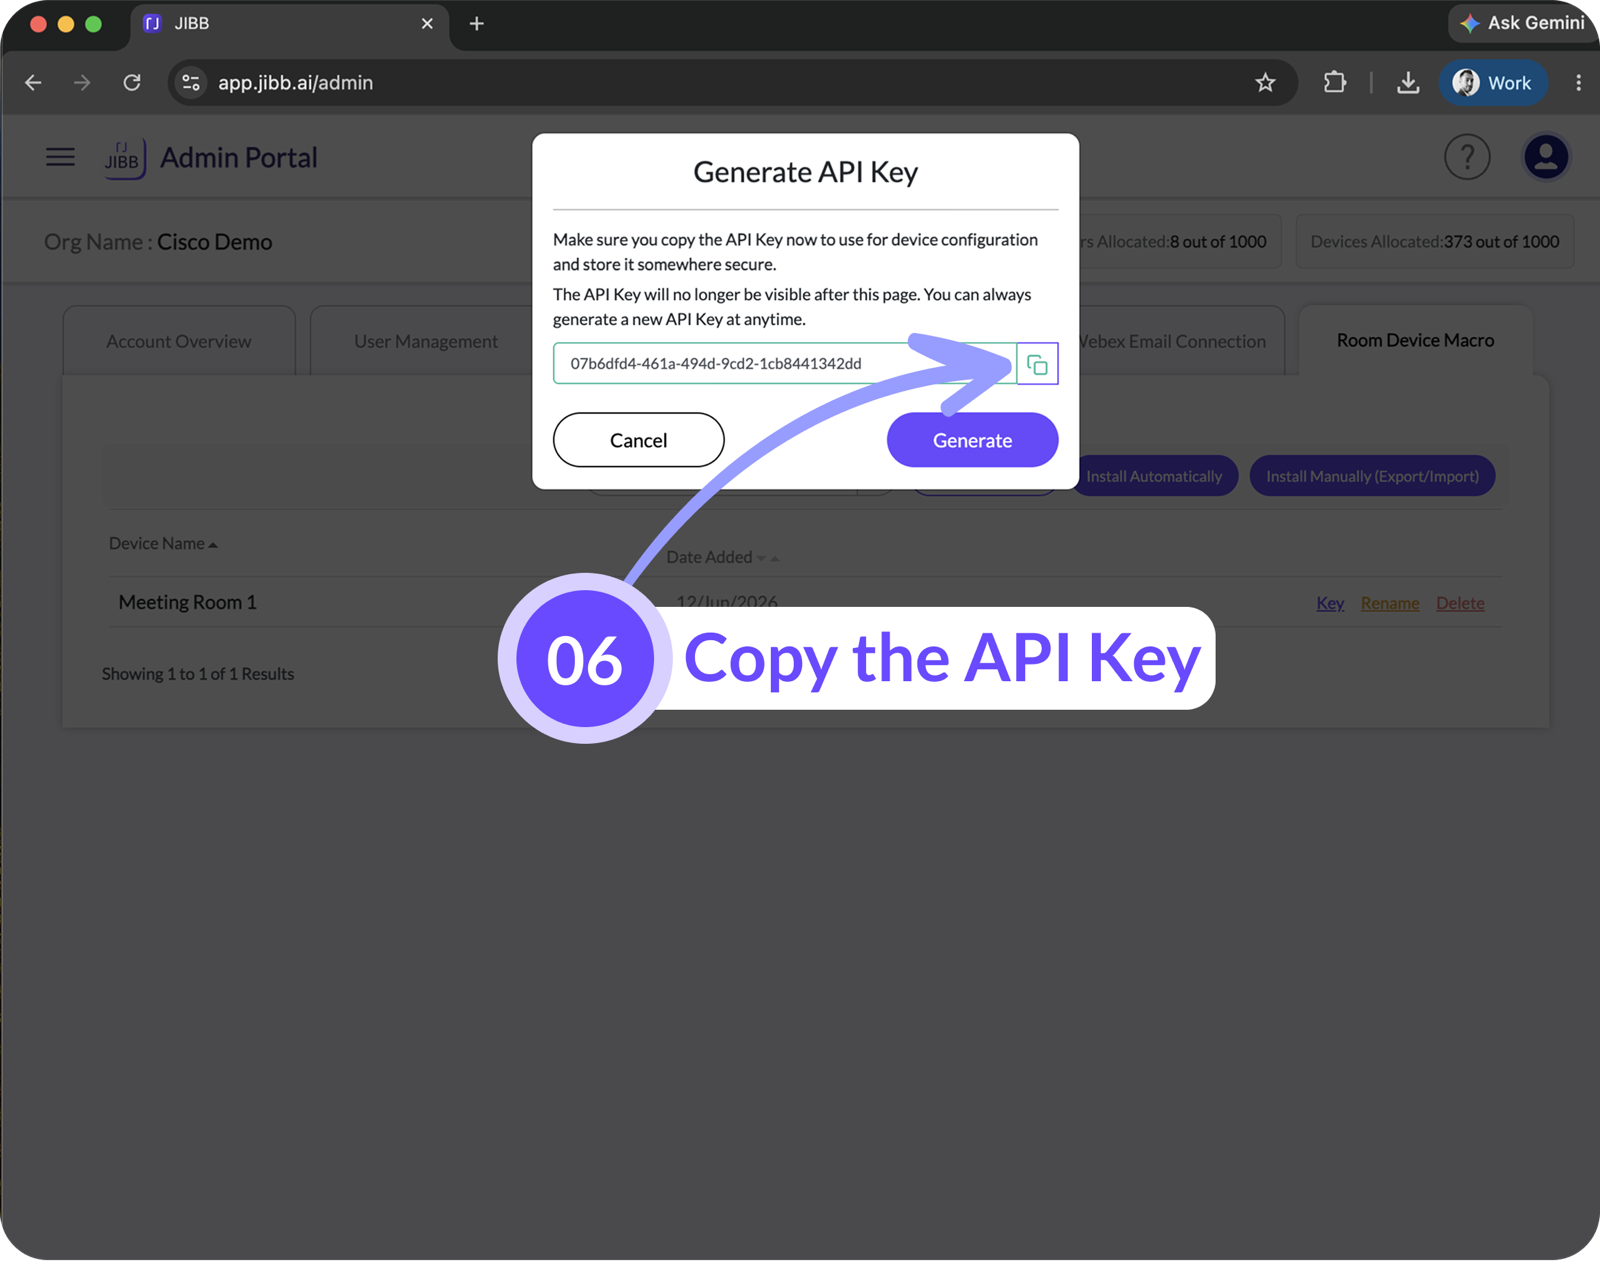

You can either install the JIBB Room Device Macro automatically or manually.
2.1 - Install Automatically
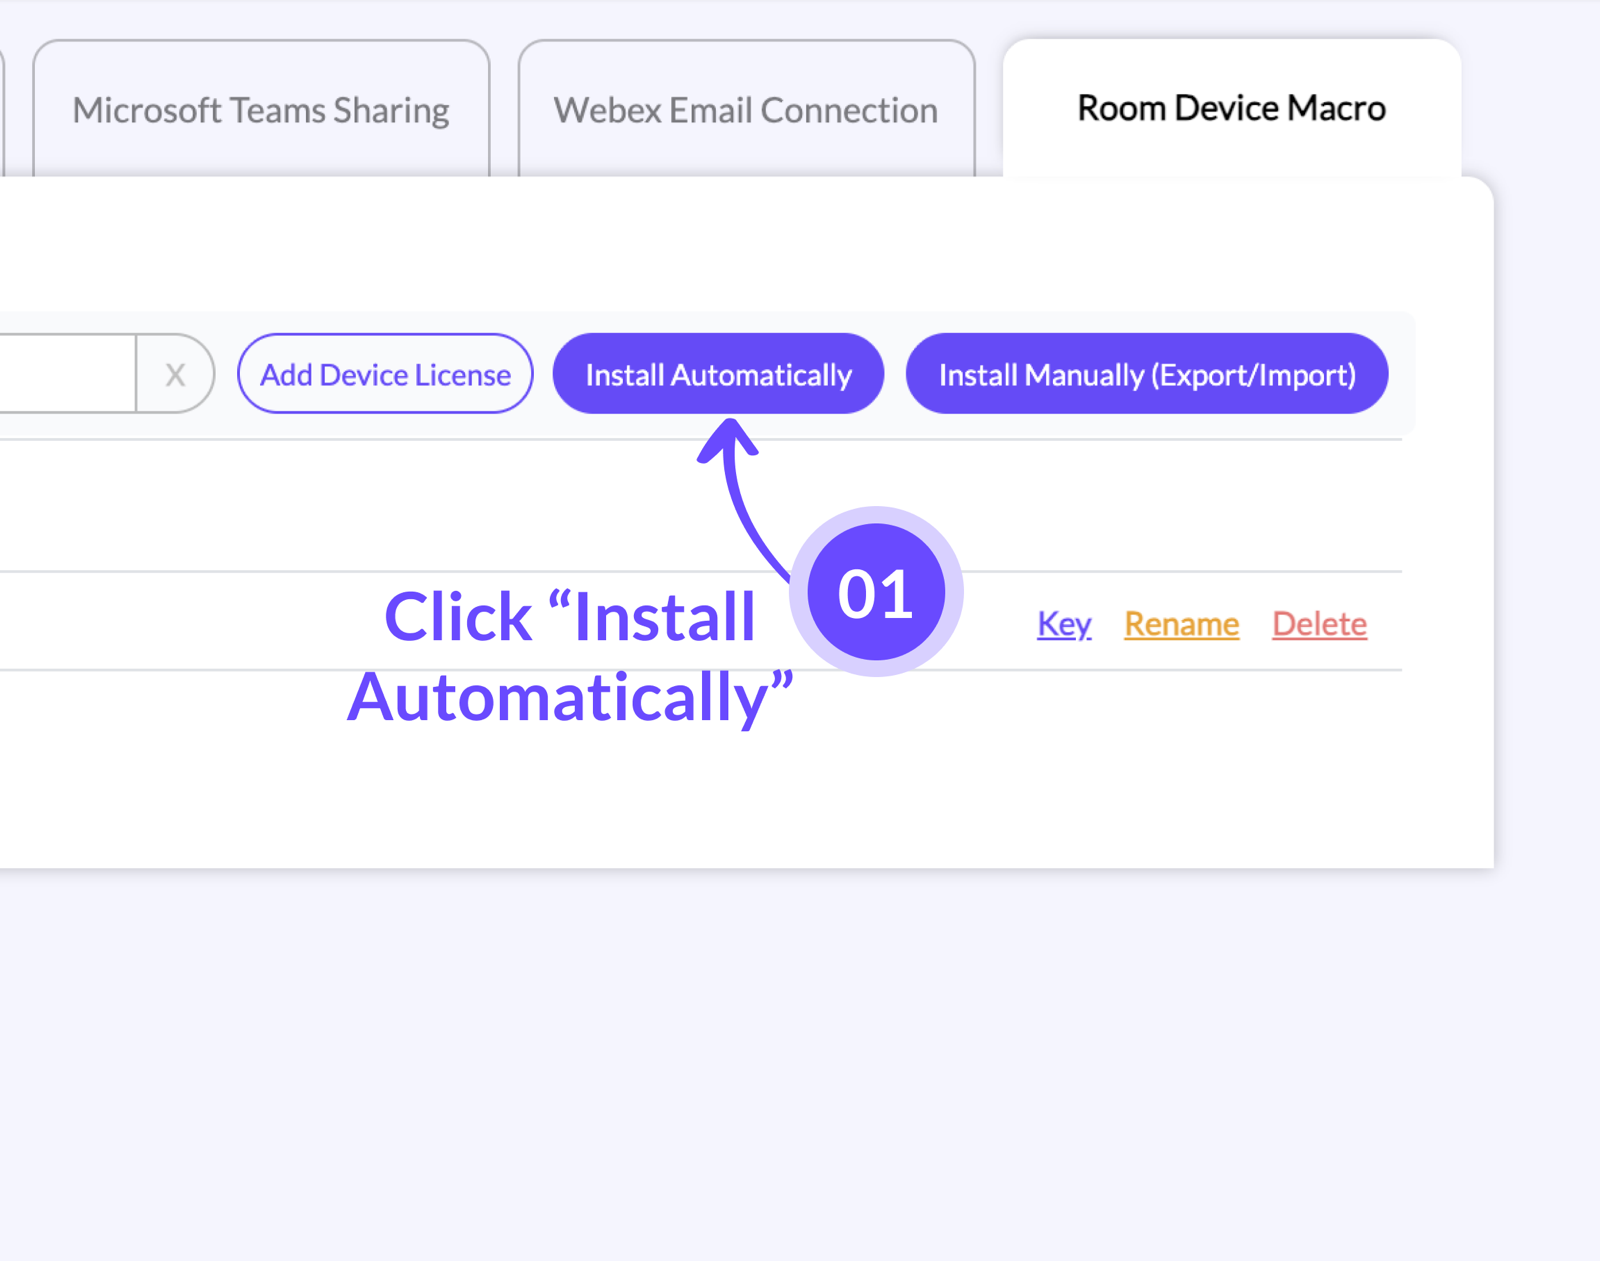
You will see a "JIBB is ready" notification appear on the Room Navigator, along with the JIBB Room app icon, as soon as the macro is successfully installed.
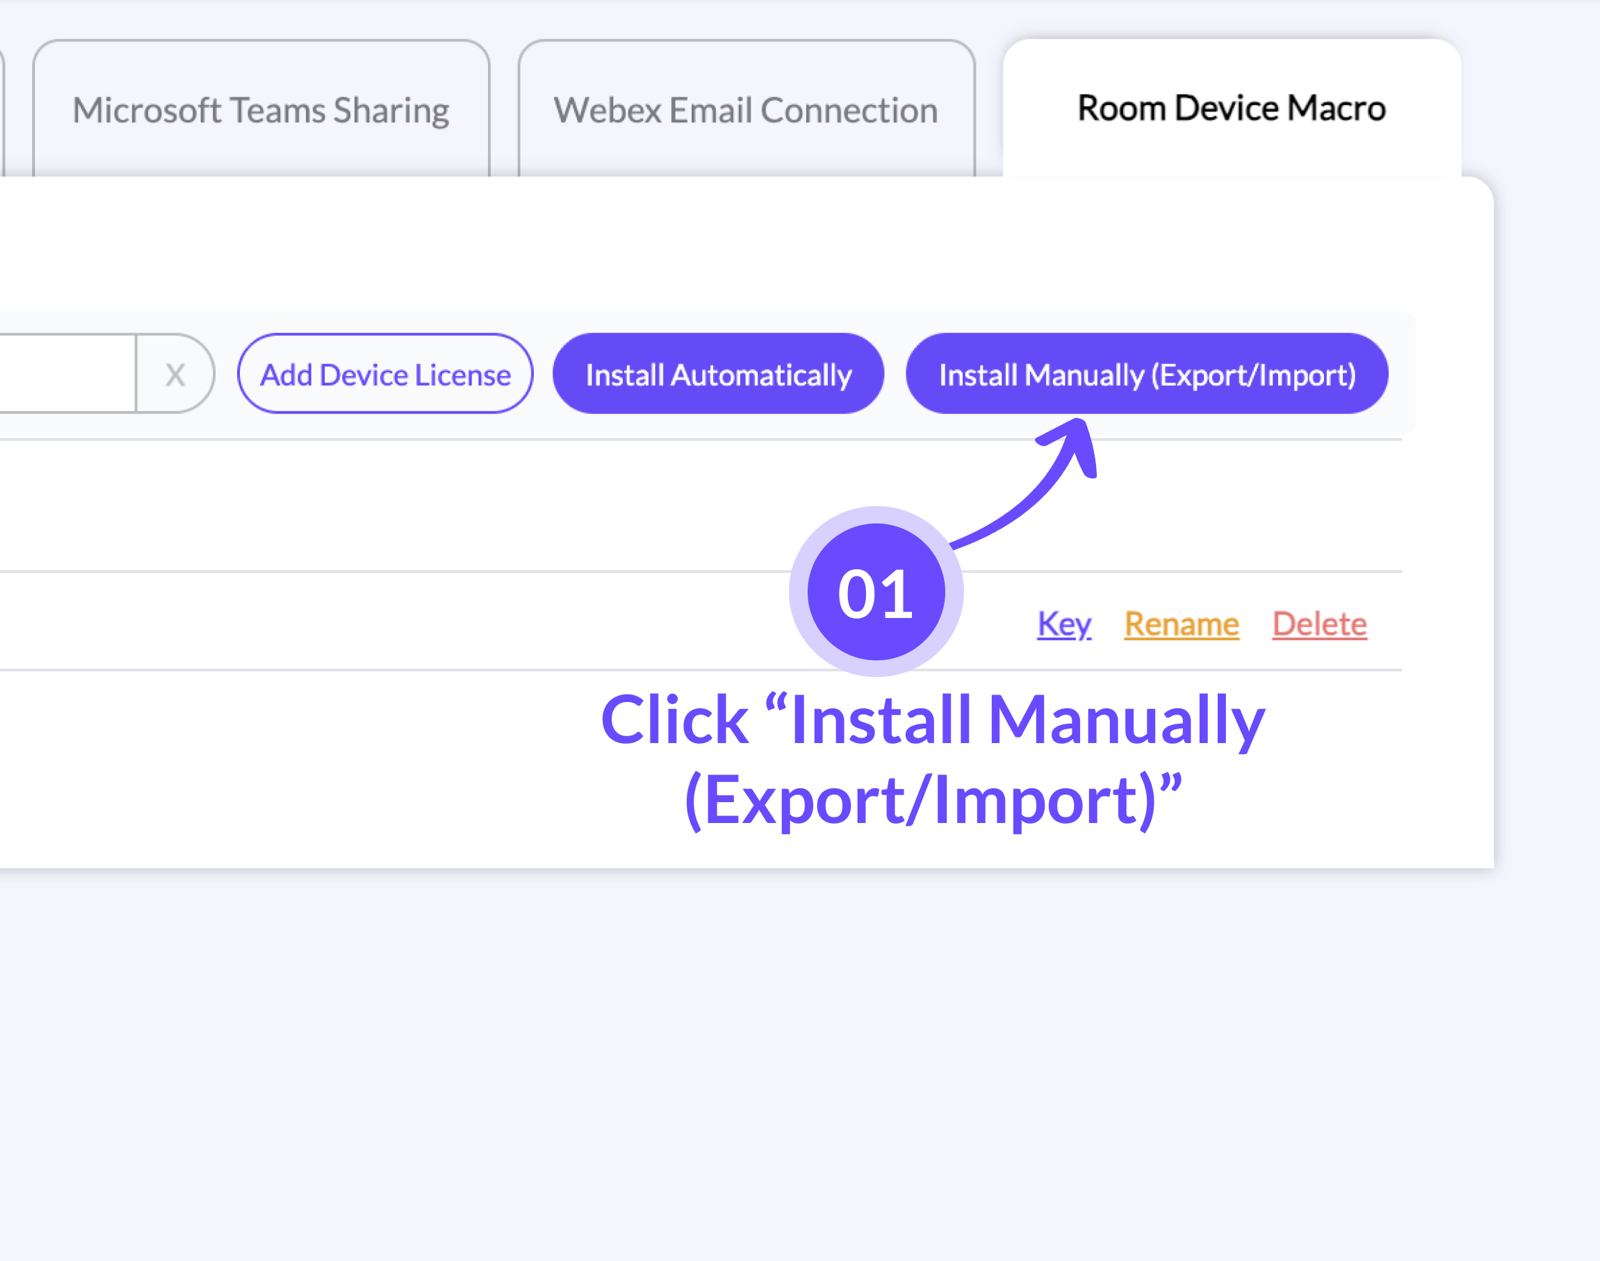
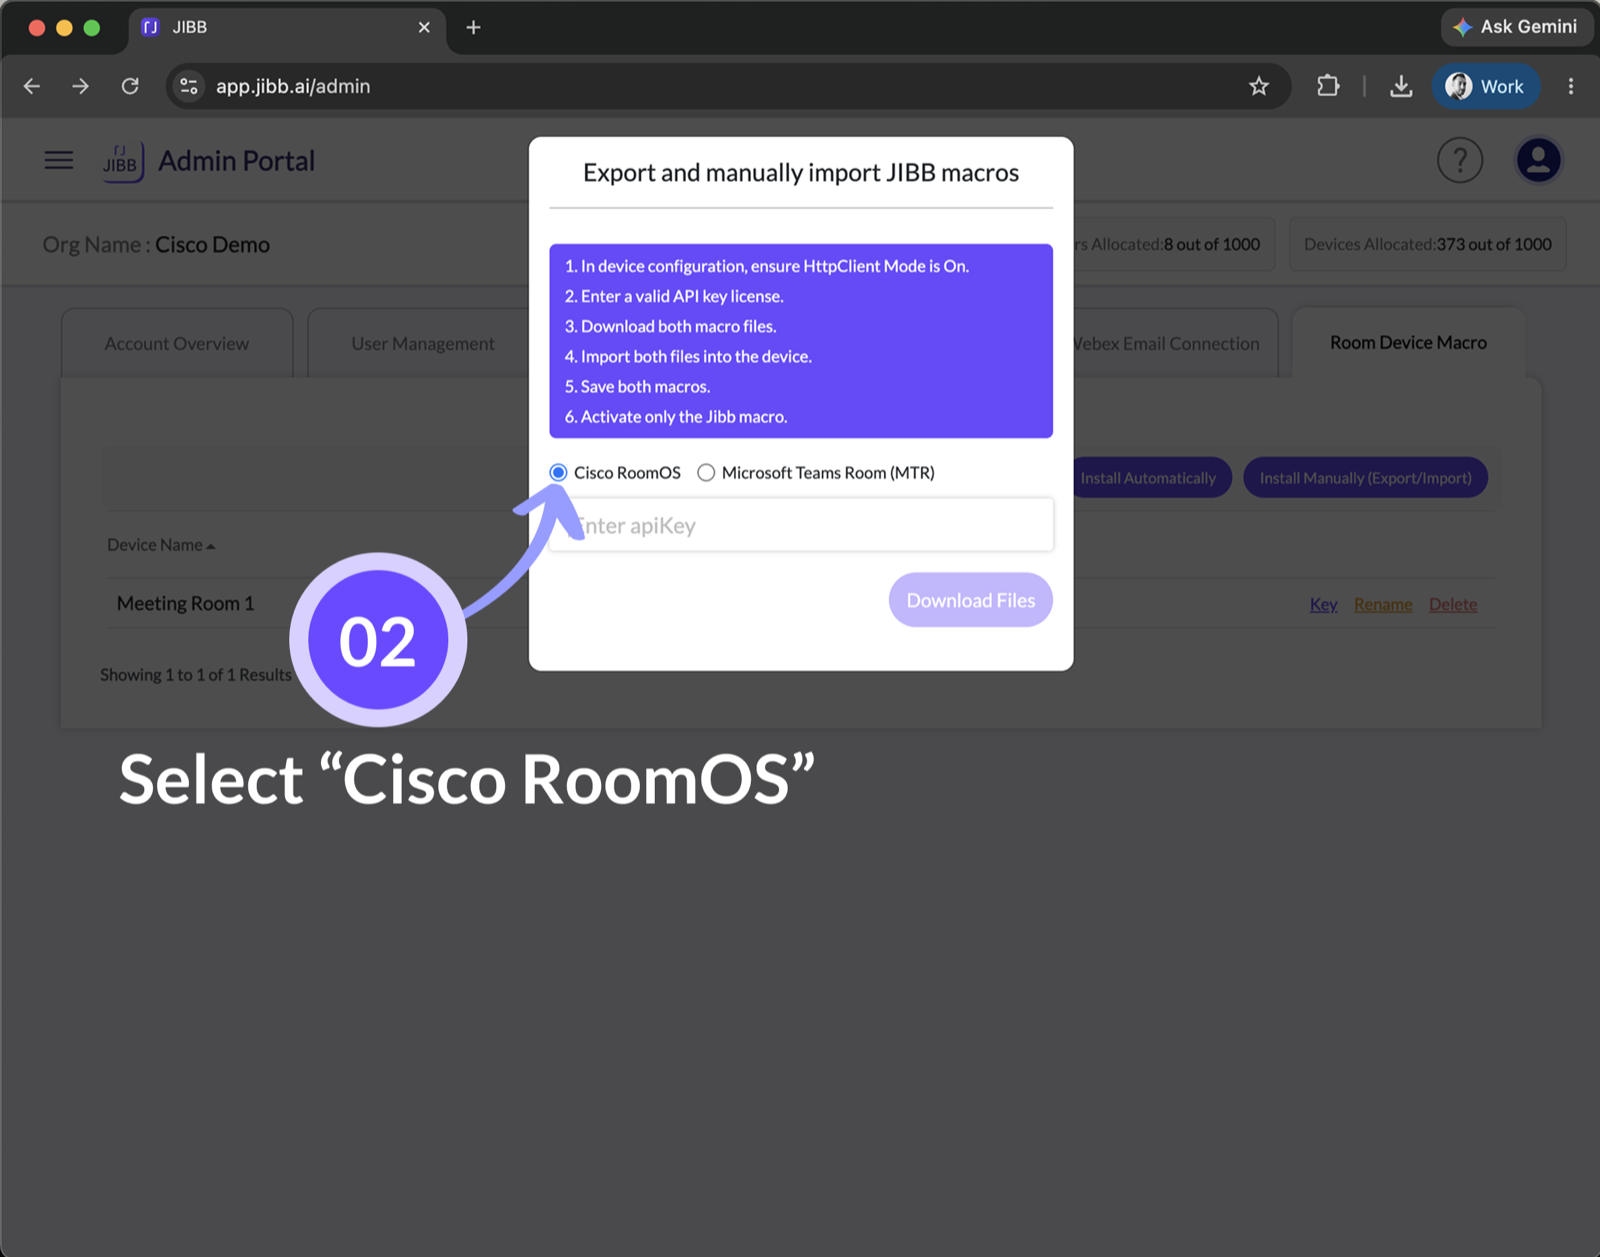
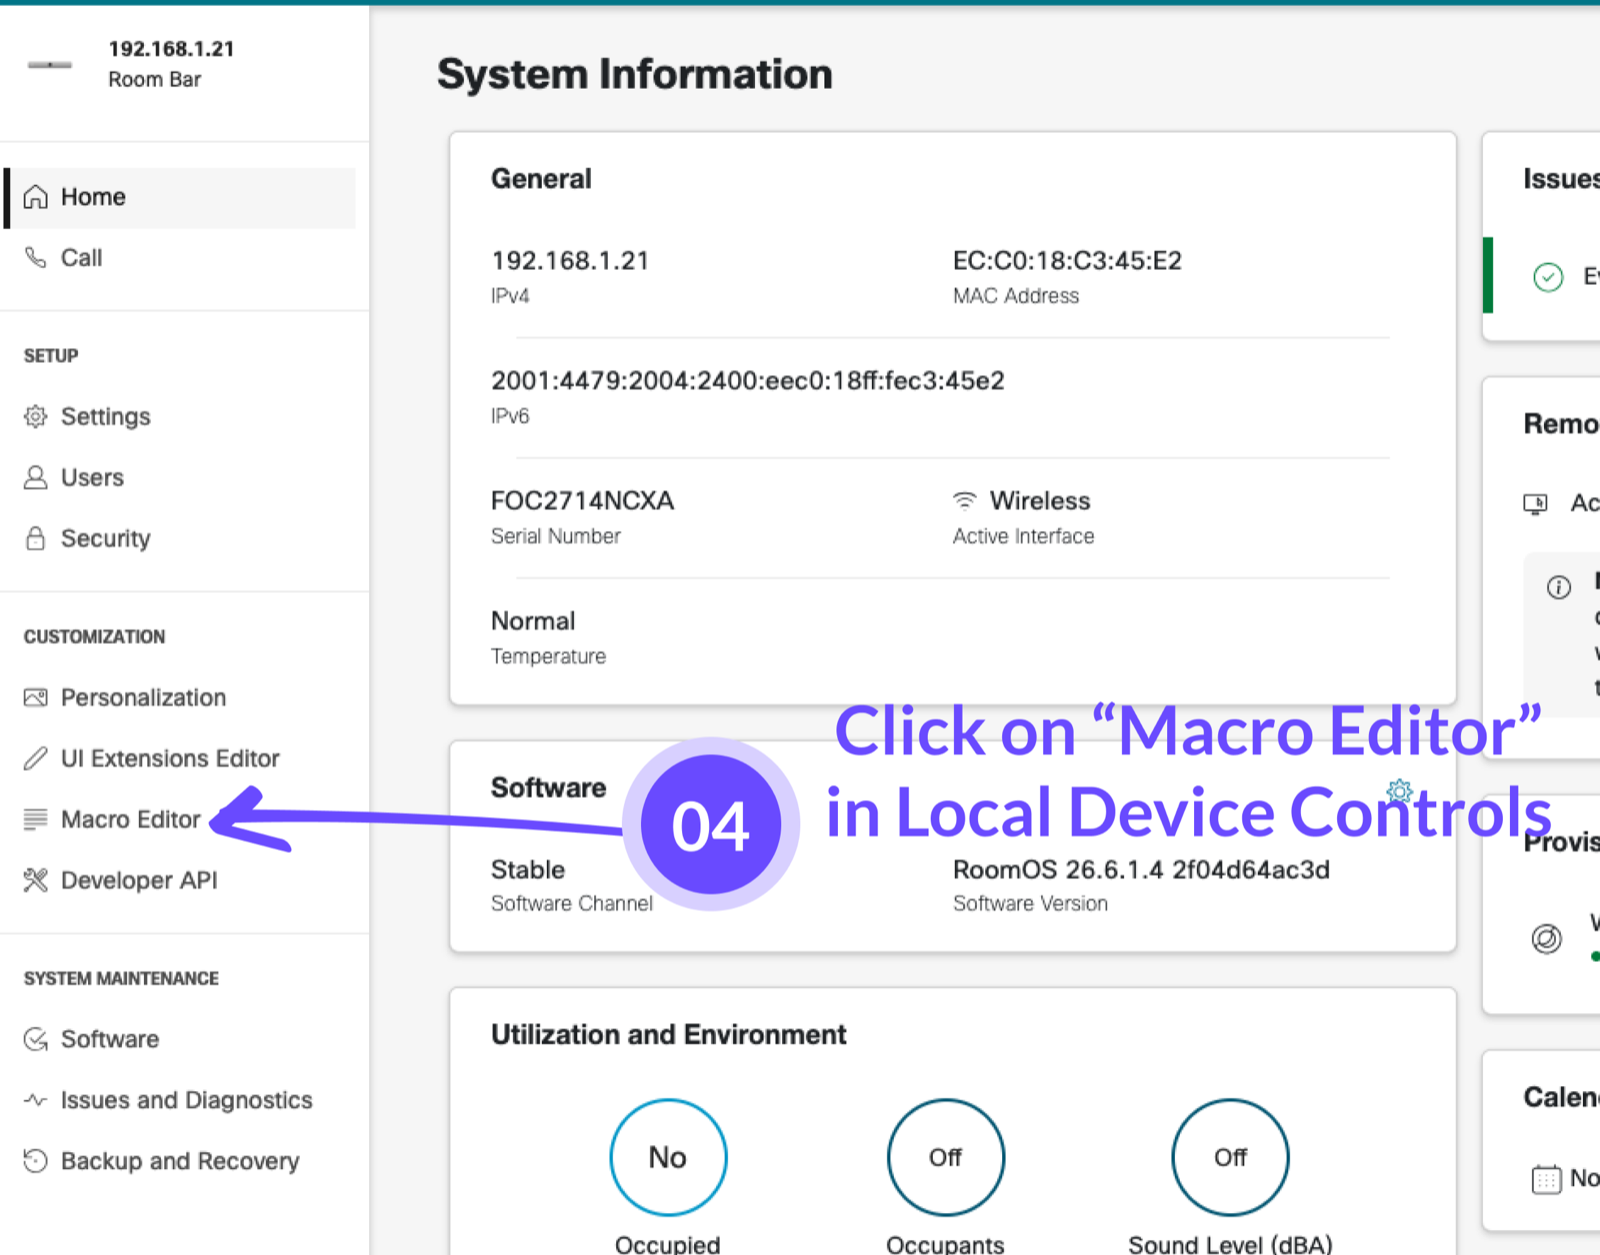
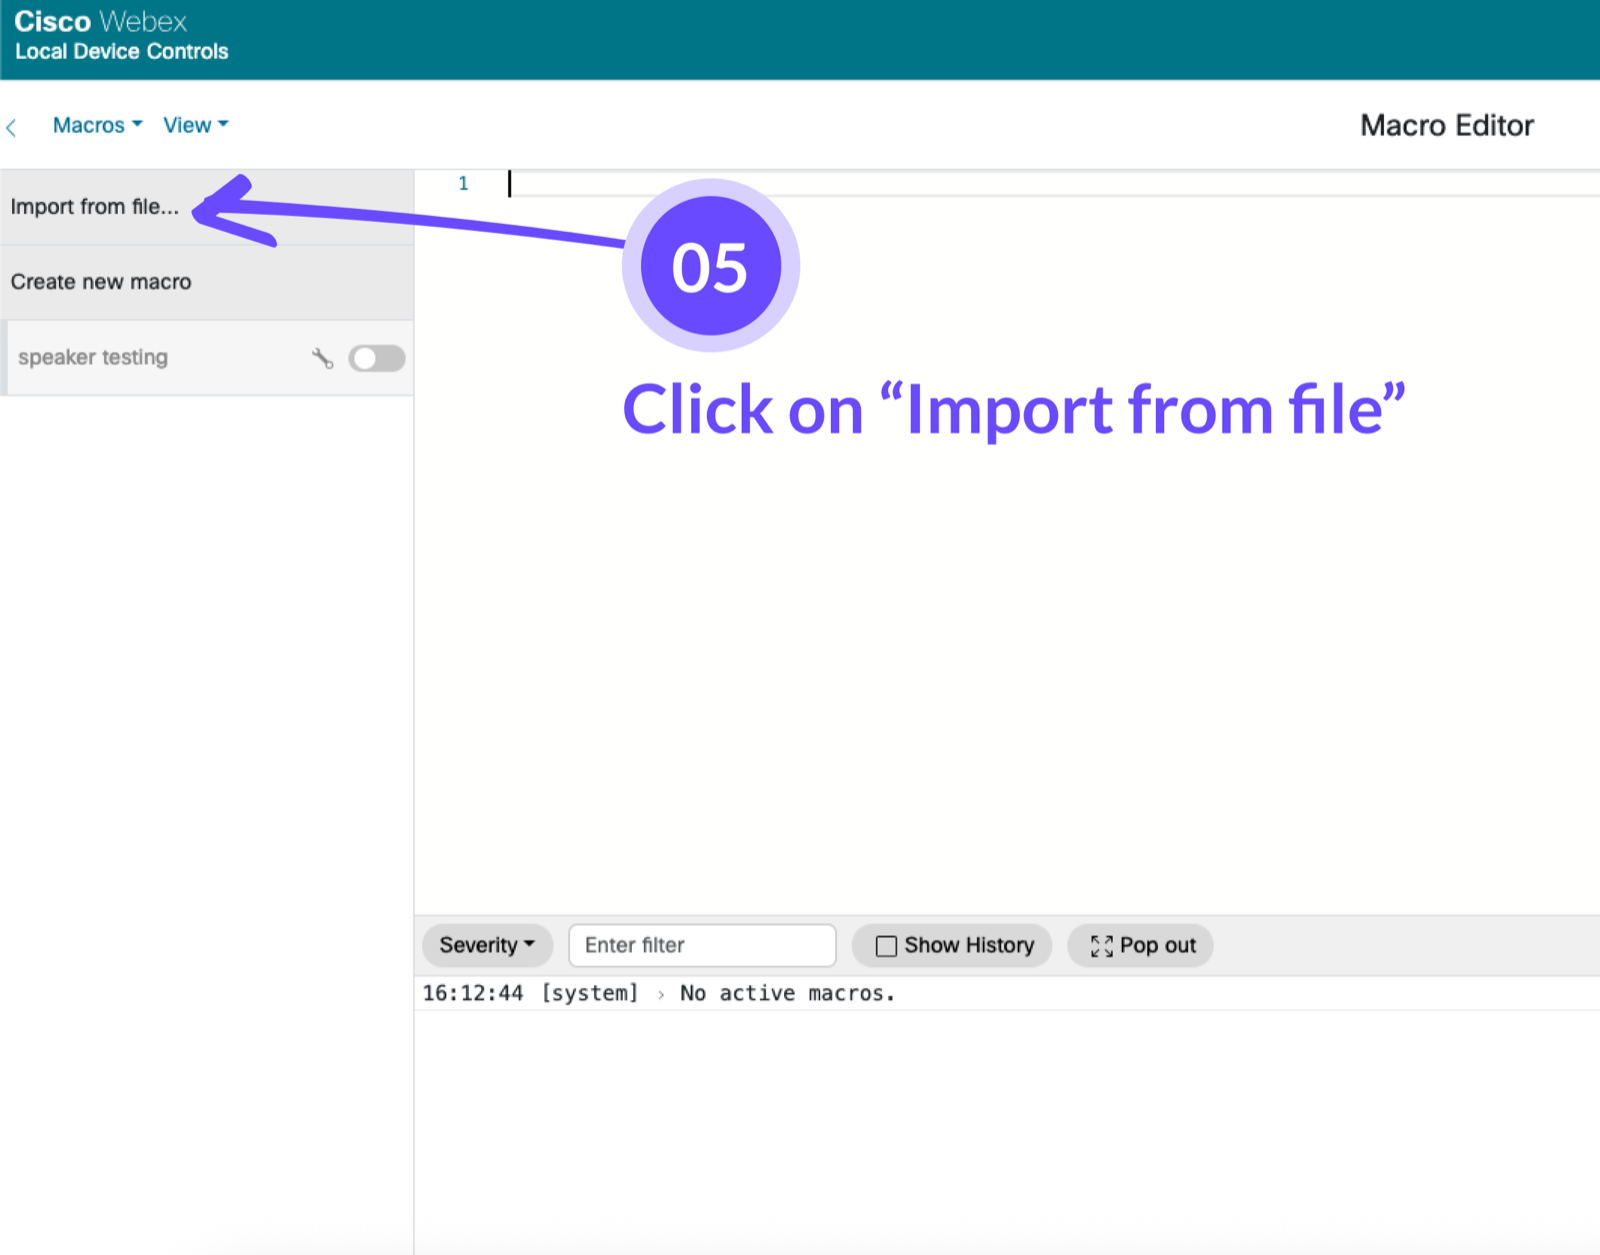
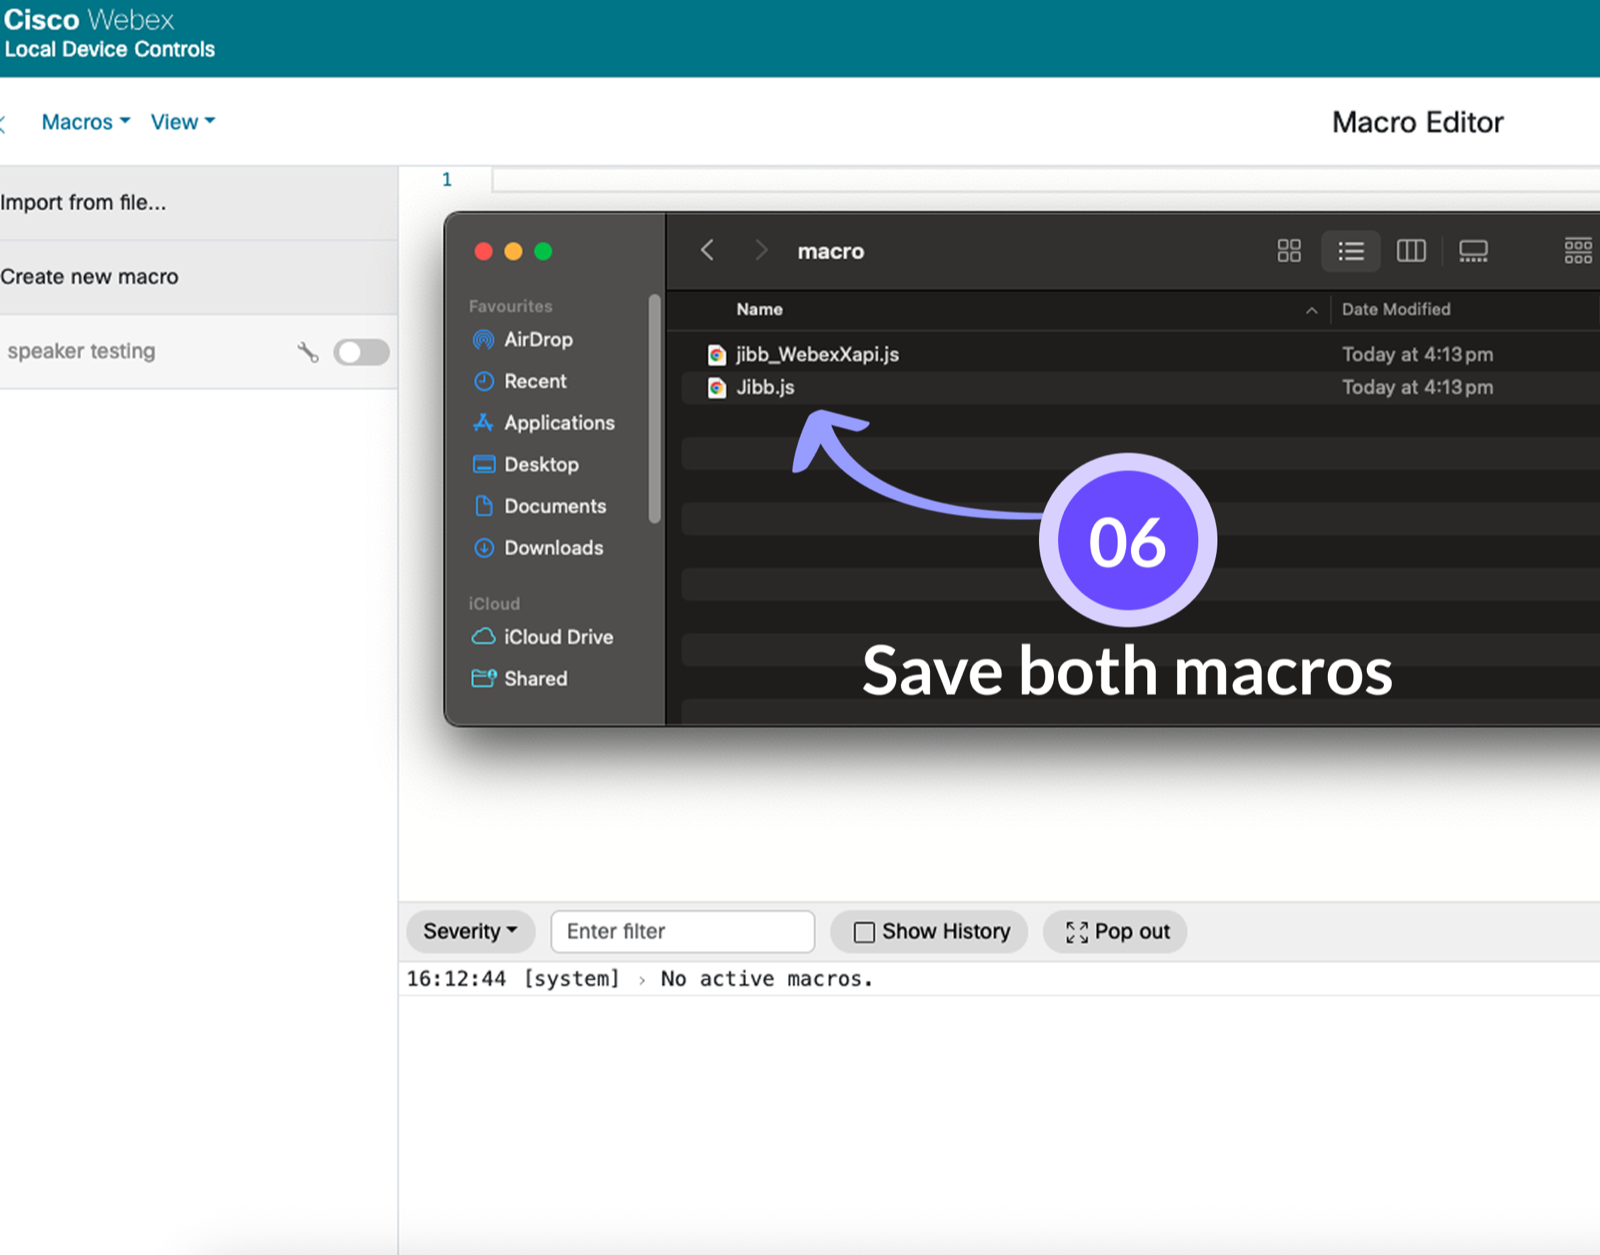
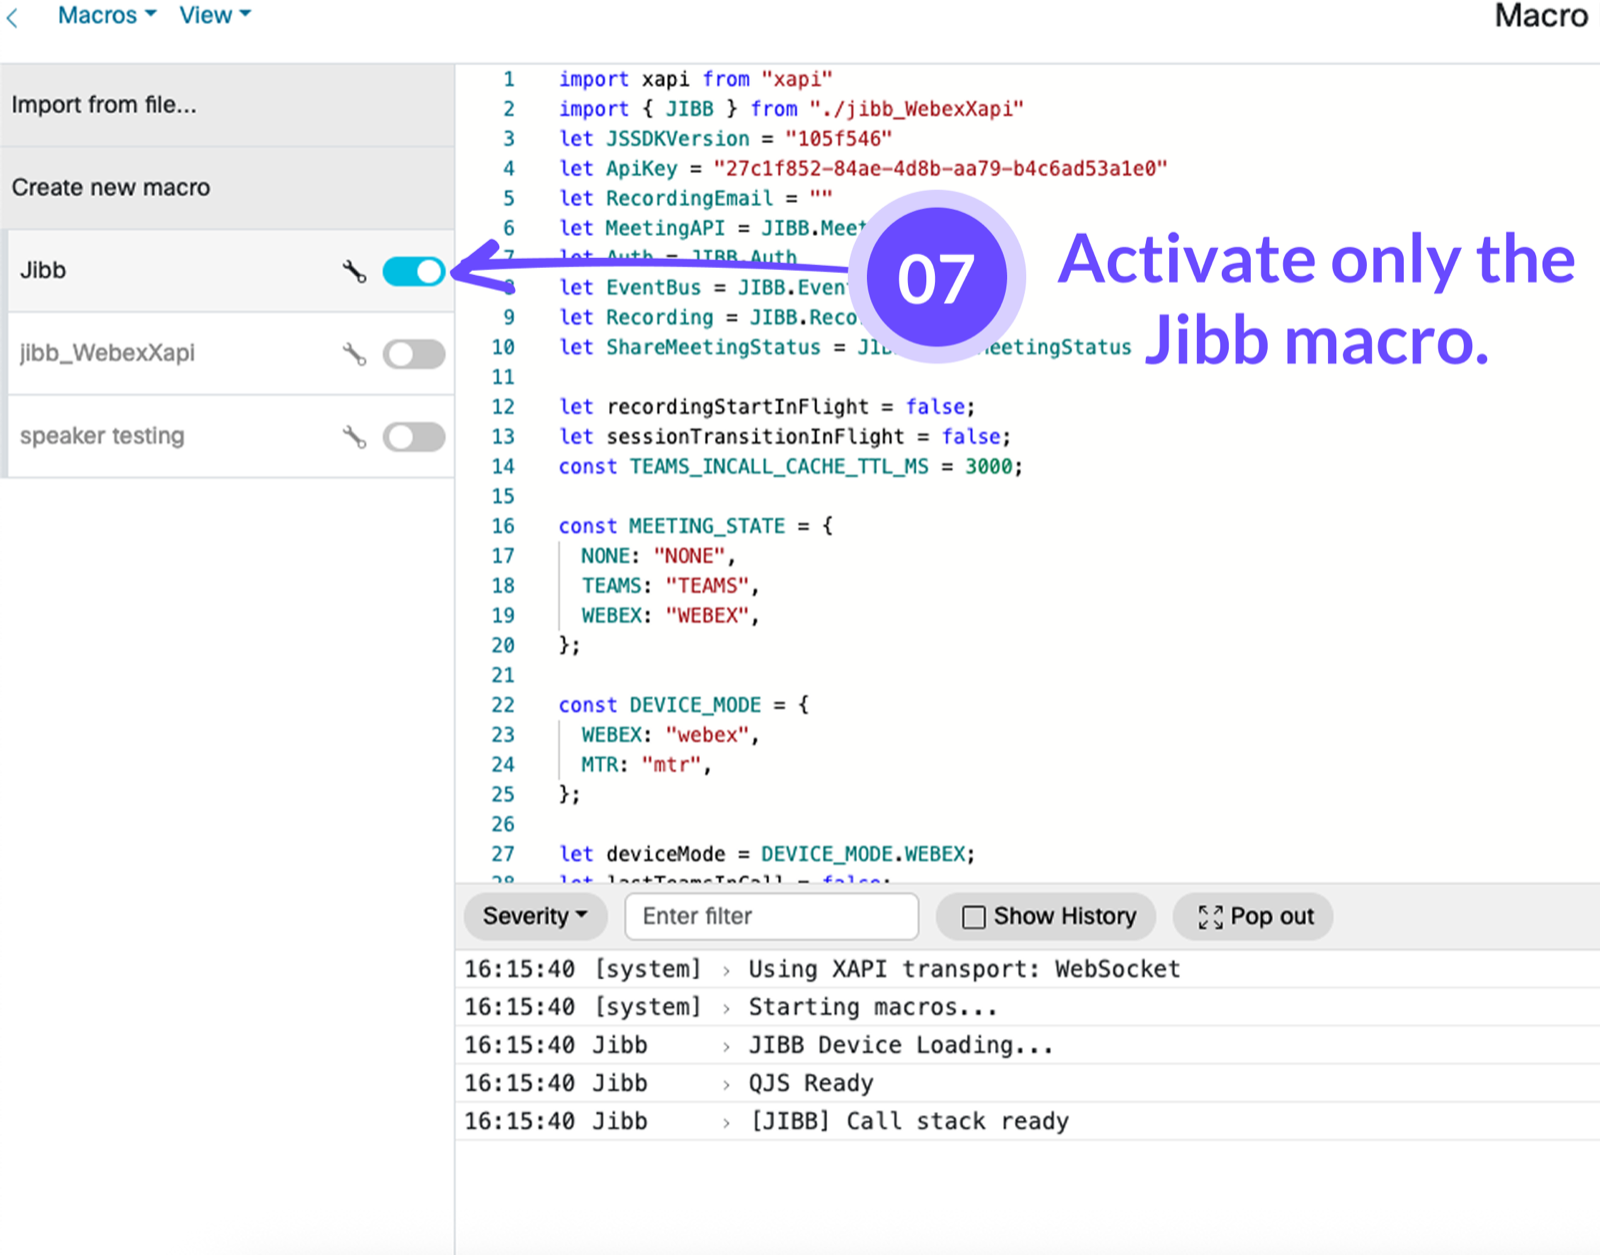
2.2 - Install Manually (Export / Import)

3. Post Installation
After installing the JIBB Room App on your device, follow these instructions to test the app or make any changes.
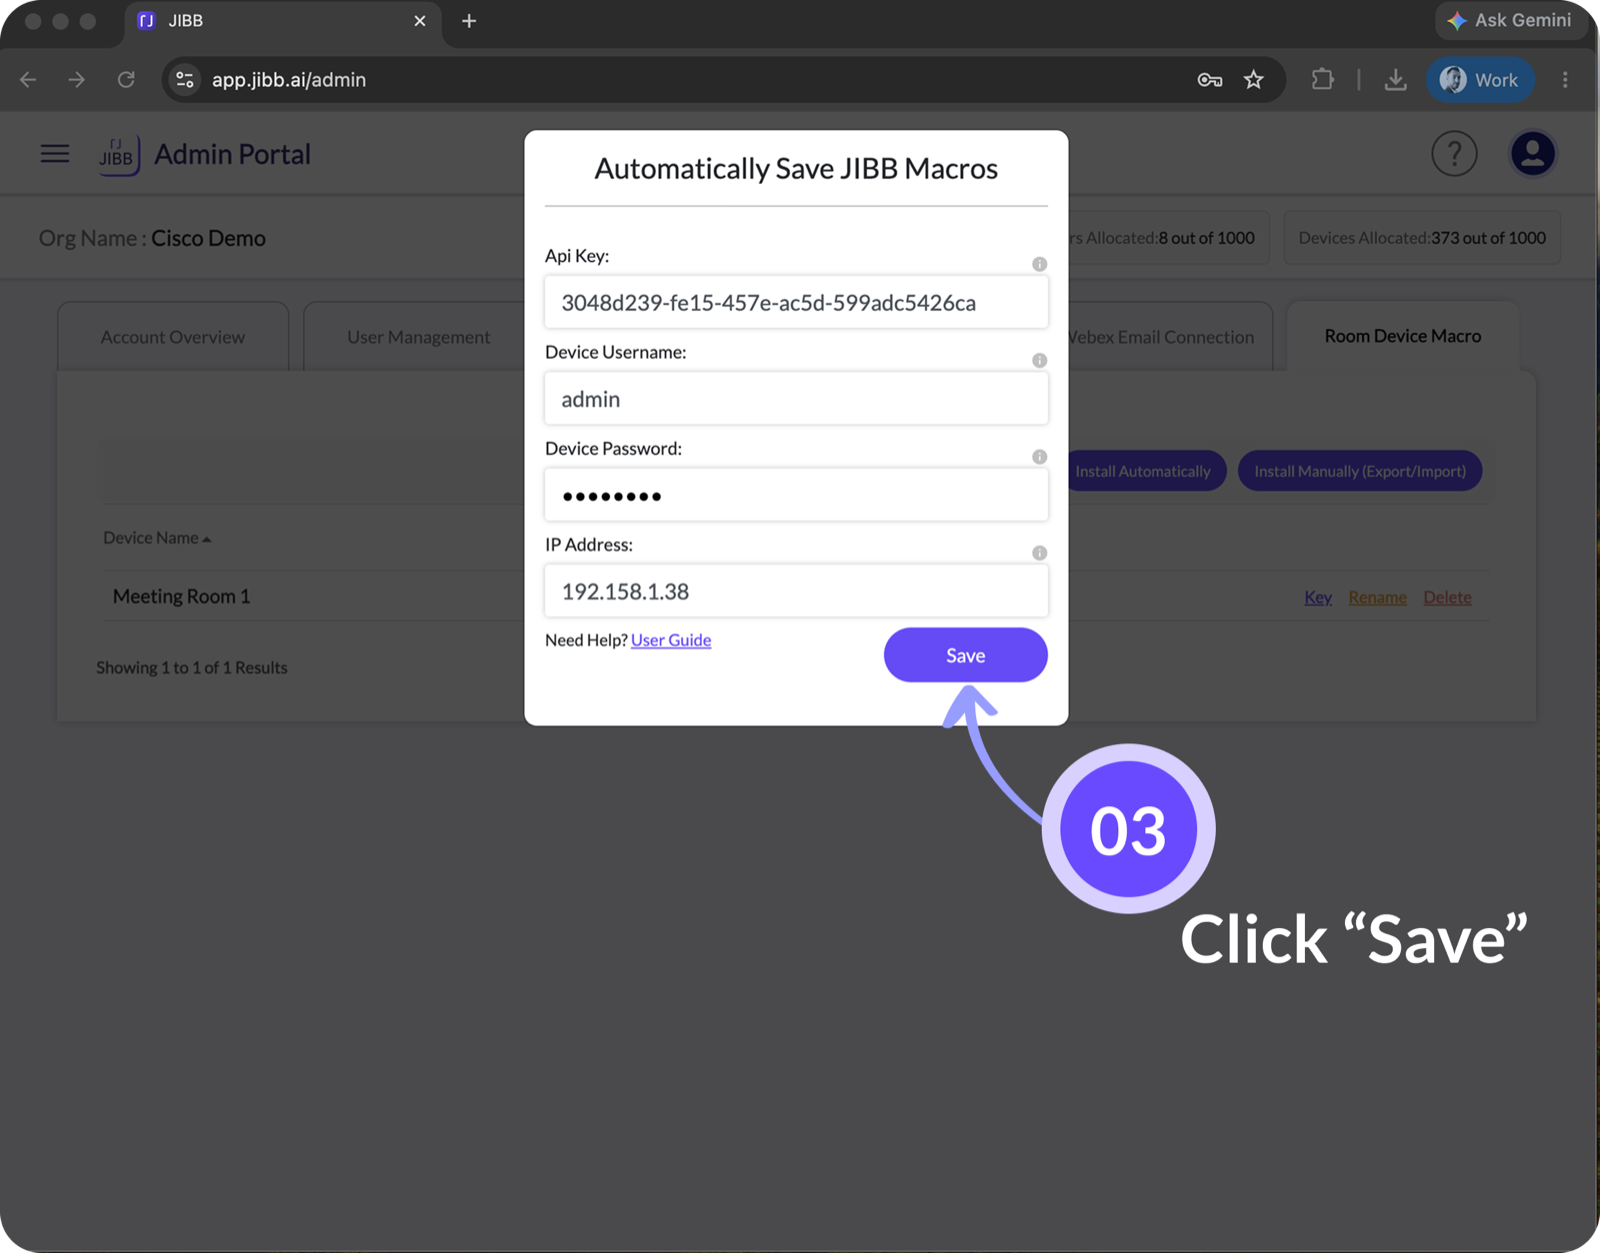
3.1 - Make sure you clicked 'Save'
When using the configuration form to install JIBB Room, always remember to click "Save" when you're done, so the app is installed correctly.
If you encountered any errors, please review the steps above or contact support@jibb.ai.
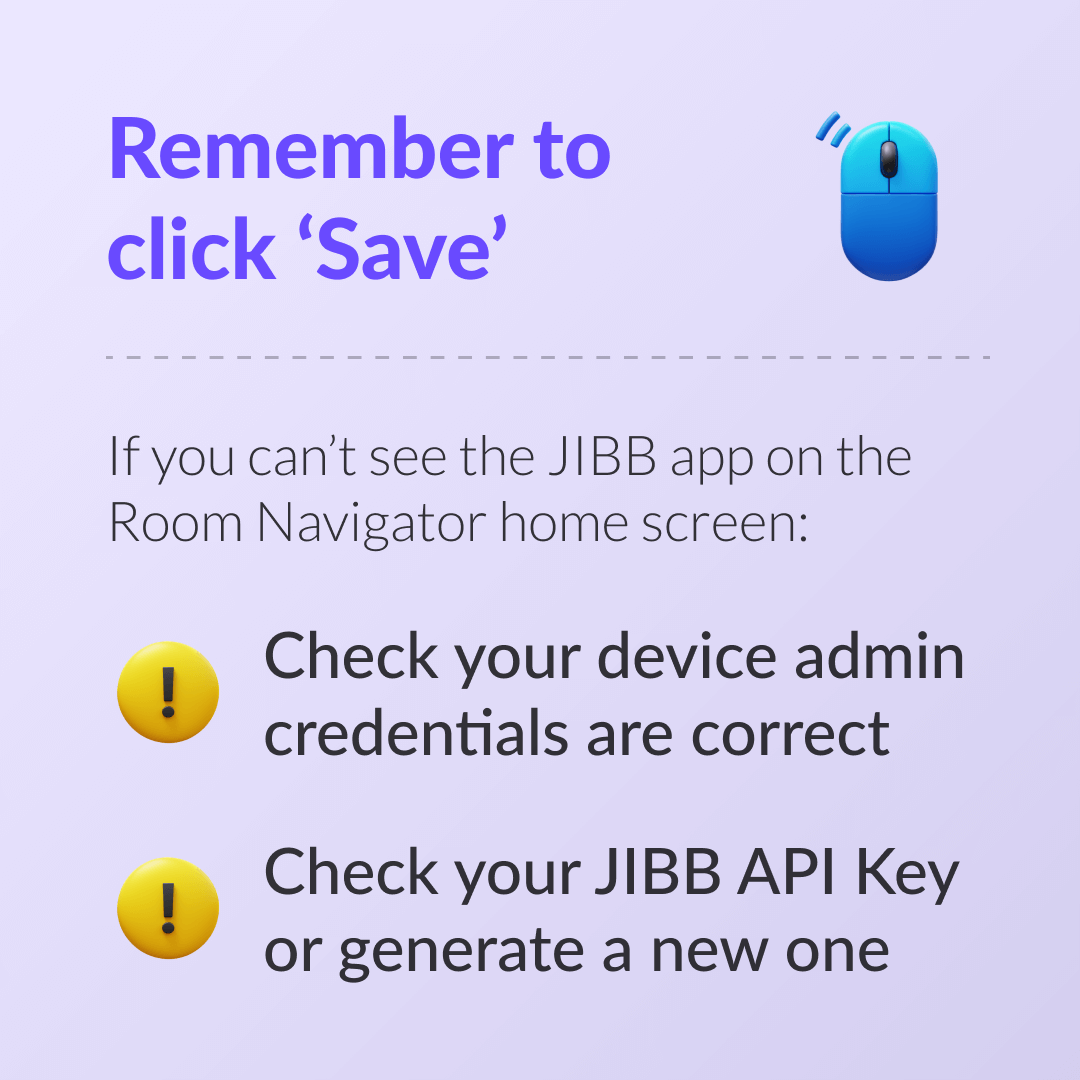
If you can’t see JIBB Room on the Room Navigator home screen:
Check your JIBB Room API Key or generate a new one.
3.2 - Check the Room Navigator
You'll know JIBB Room is installed when the JIBB Room App icon is added to the Room Navigator touchscreen (or inside the Control Panel if your device is running on MTR mode).
If you are updating the app after it's already installed, you'll see a "JIBB is ready" notification appear on the Room Navigator.
3.3 - Removing JIBB Room from your device
If you've already installed JIBB Room using the method above and want to uninstall the app from your device so you can install it on another device using the same API Key, follow the instructions in this video.
4. JIBB Room Camera Preset
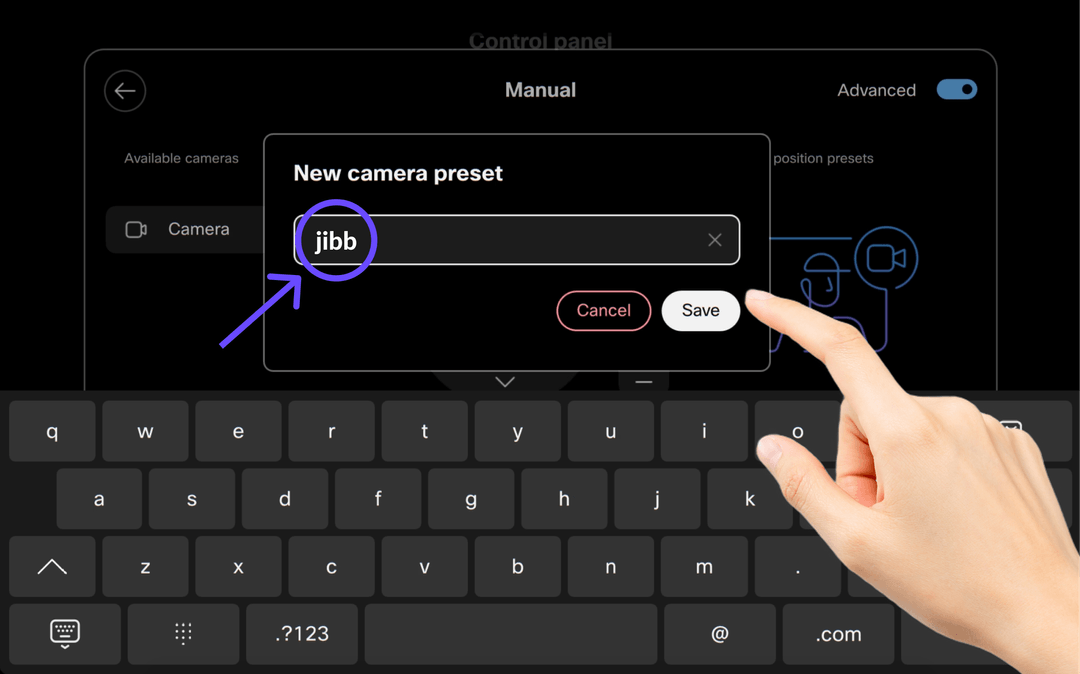
In order for JIBB Room to automatically snap to your whiteboard every time someone uses the app, we strongly recommend creating a new Camera Preset position named "jibb" on your device.
4.1 - Aim, Set & Forget
On your Room Navigator, go to the manual controls and aim the camera at the meeting room whiteboard, zoom in or out, making sure it fits the whole writing surface inside the camera preview that will be displayed on the TV screen/monitor connected to your device.

You must name this new camera preset "jibb"
Make sure you tap "Save". Once installed, the JIBB Room macro will use this preset to ensure that every time someone starts JIBB Room on the device, the camera will automatically snap to the whiteboard.
Watch the tutorial video to see how it's done.
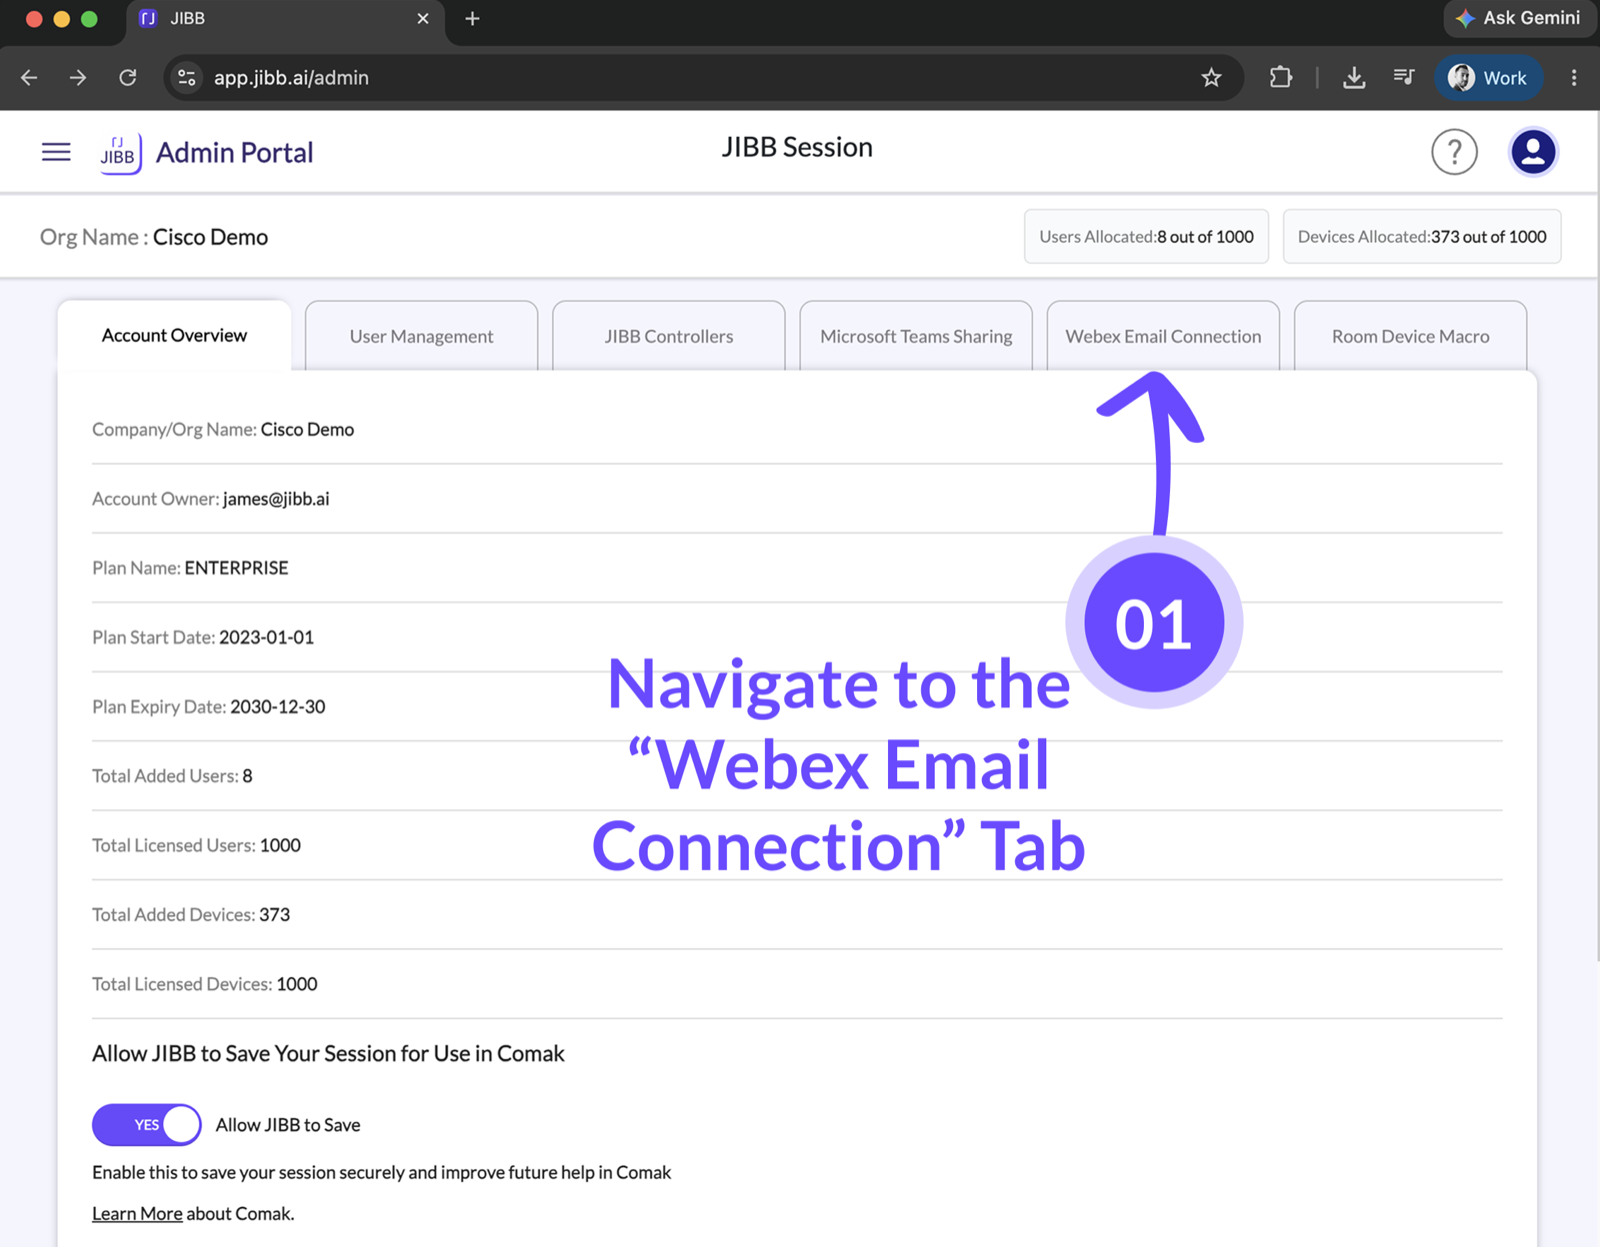
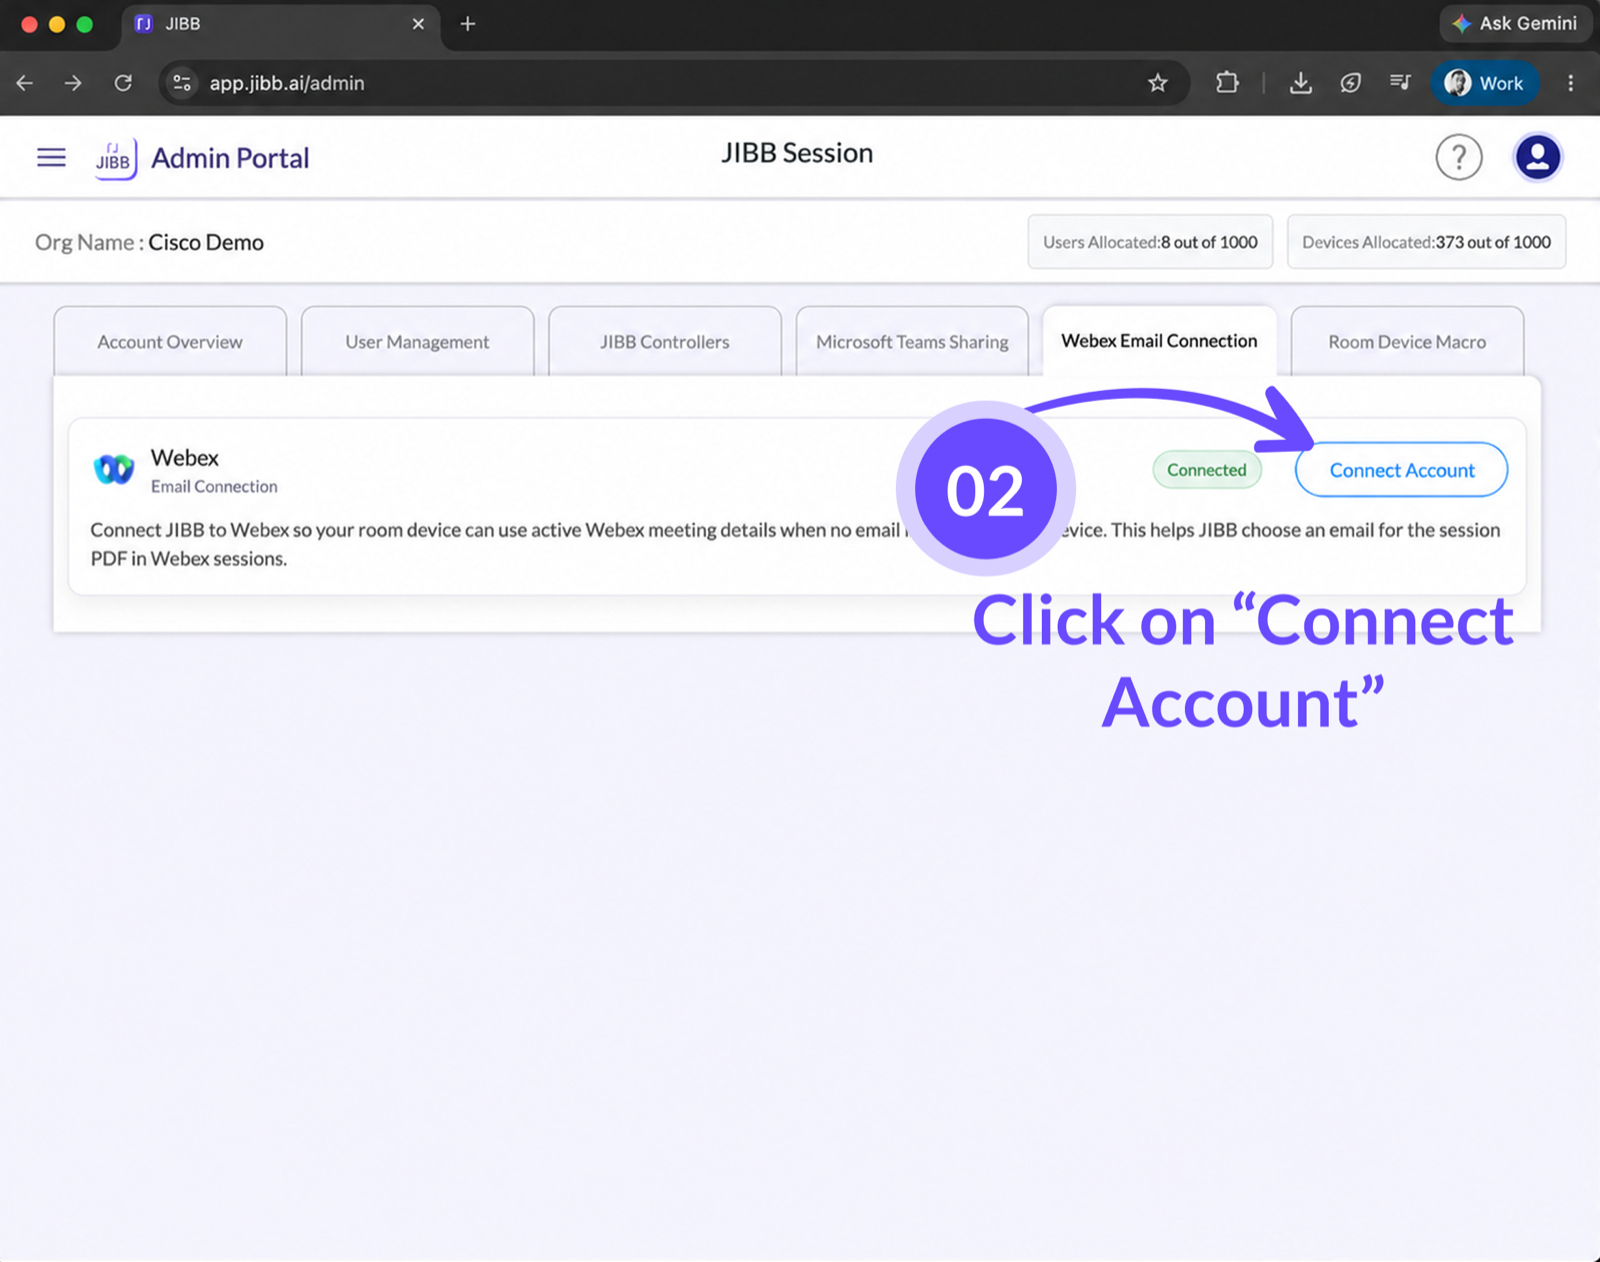
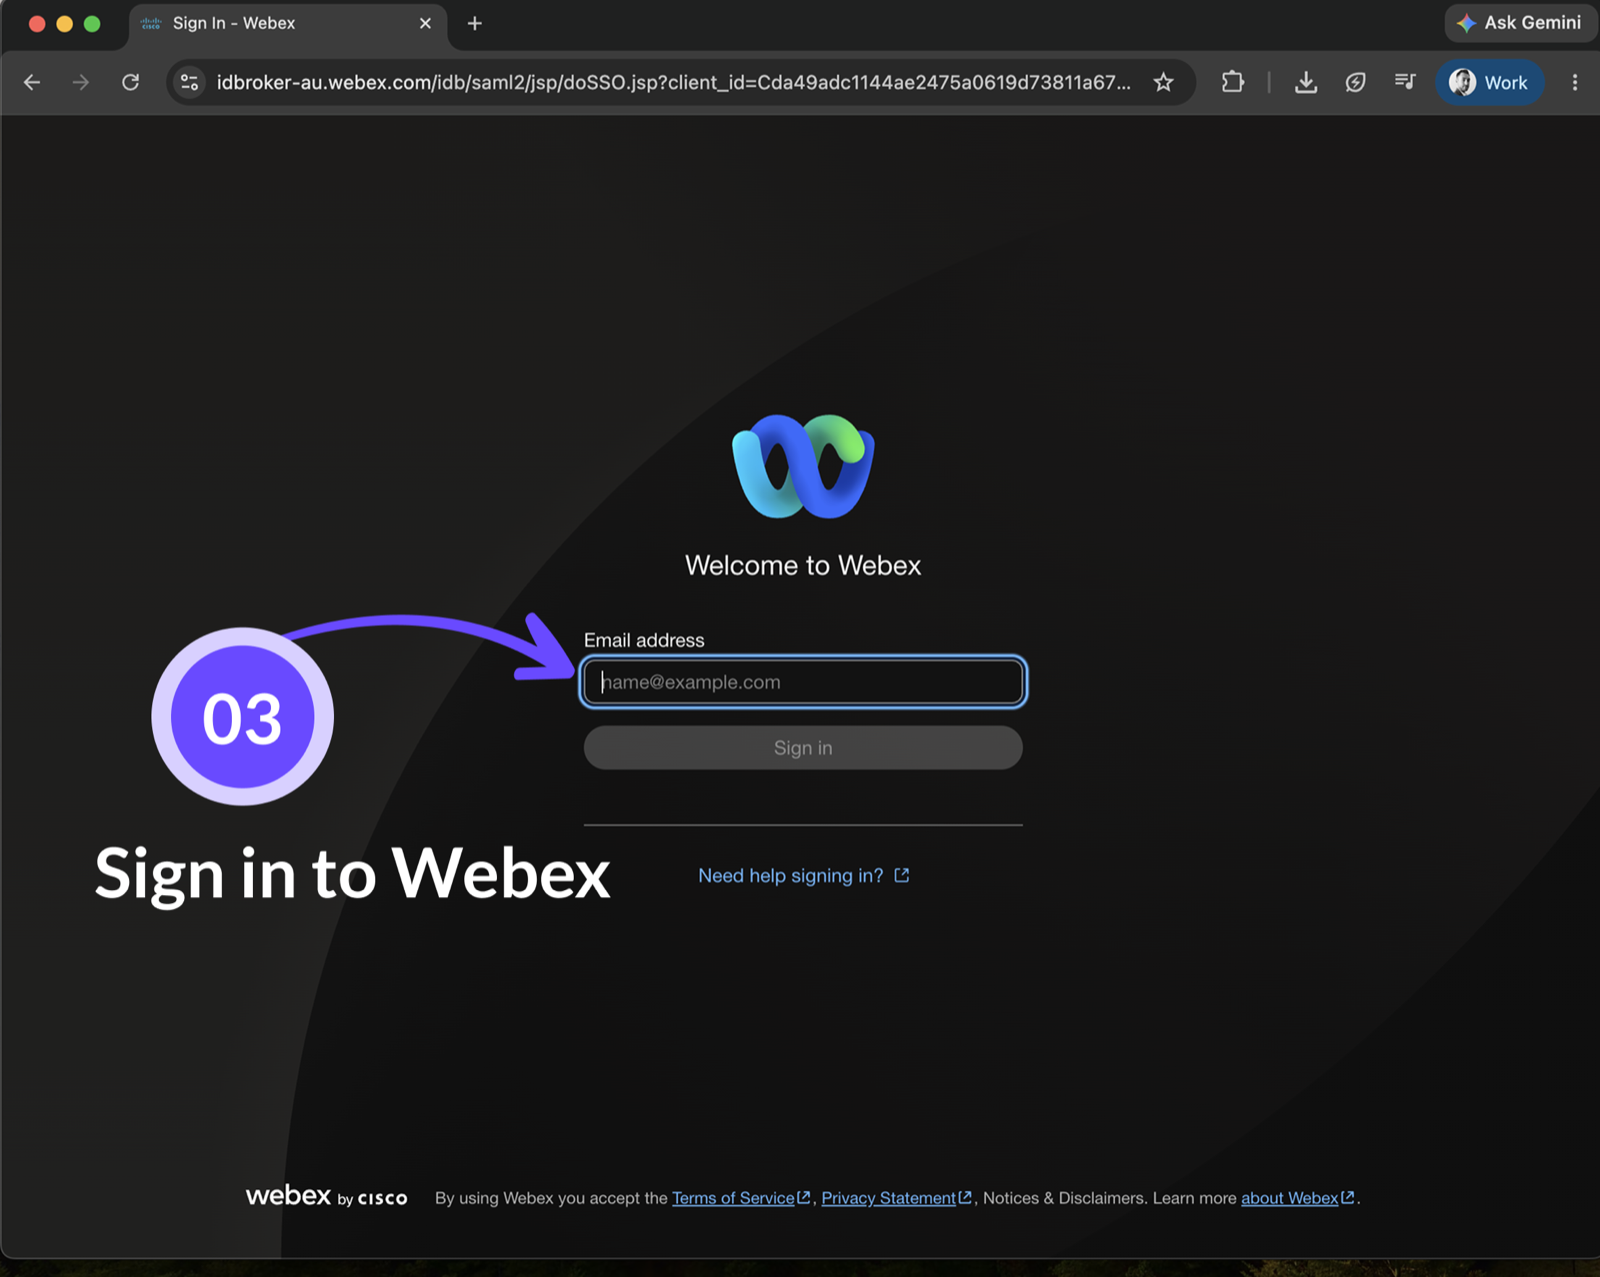
5. Webex Email Connection
Connect JIBB to Webex so your room device can use active Webex meeting details when no email is entered on the device. This helps JIBB choose an email for the session PDF in Webex sessions.
Still Need Help?
If you didn’t find the answer here or need help with something more specific, our support team is ready to assist. Use the options below to get personal support or raise an issue.