Follow the instructions on this page to learn how to use the integrated JIBB app inside Webex.
Watch the tutorial video below to get started
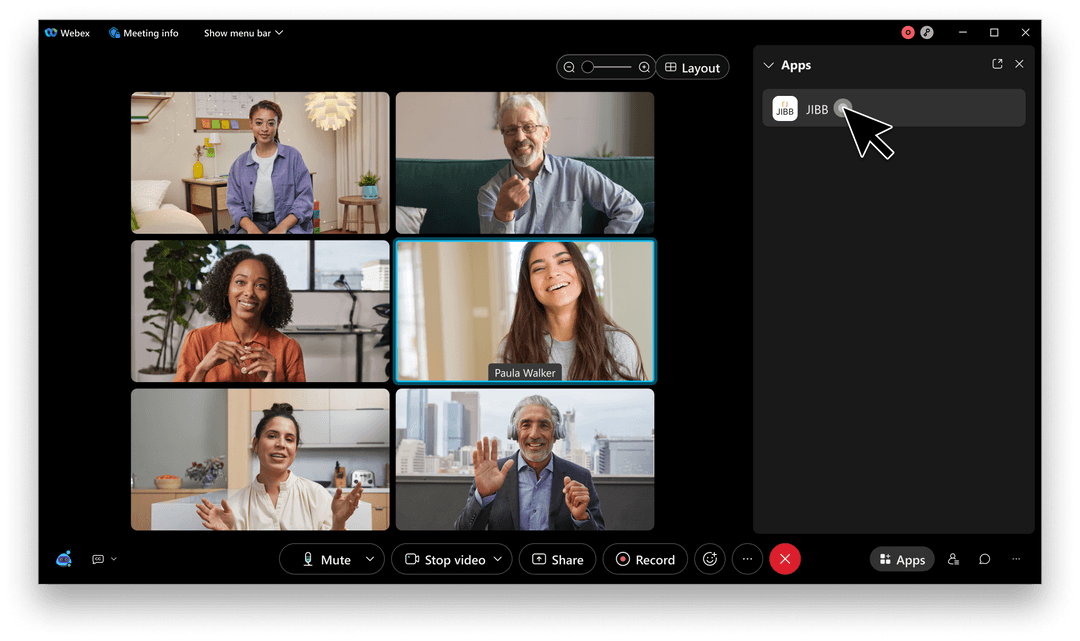
Once you have started your Webex Meeting, access the JIBB app by clicking on the “Apps” button to browse through the library of integrated apps and then select JIBB.

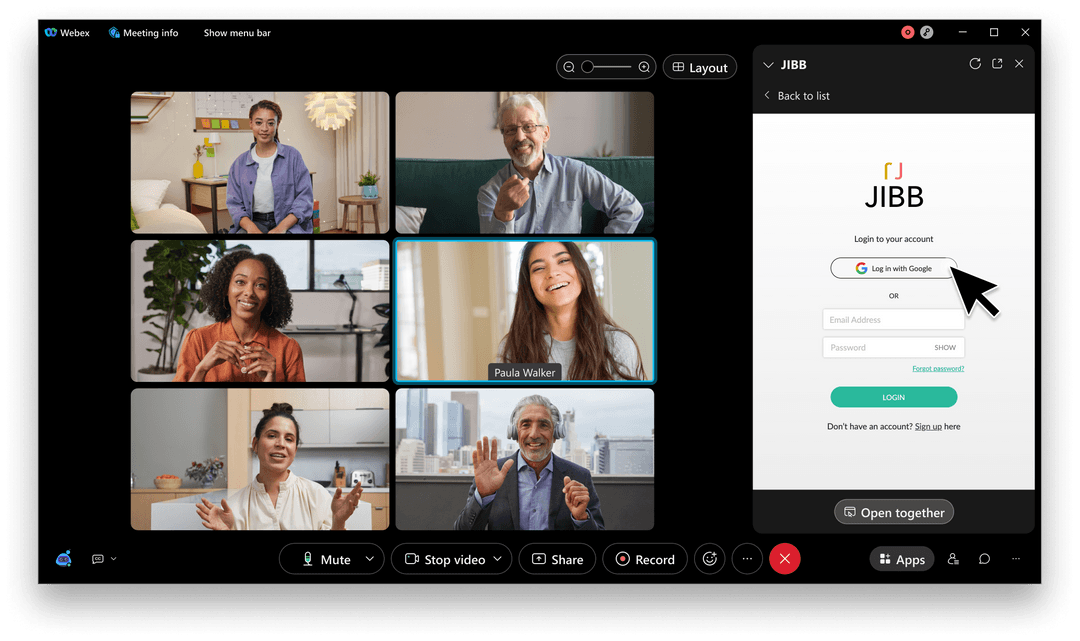
In order to use the JIBB app and share your writing, you’ll need a JIBB account to log in and share your writing.
At this point, you can also choose to click on the “Open Together” button so your meeting participants can see your JIBB workspace too. You can also expand the window for a nicer viewing experience.

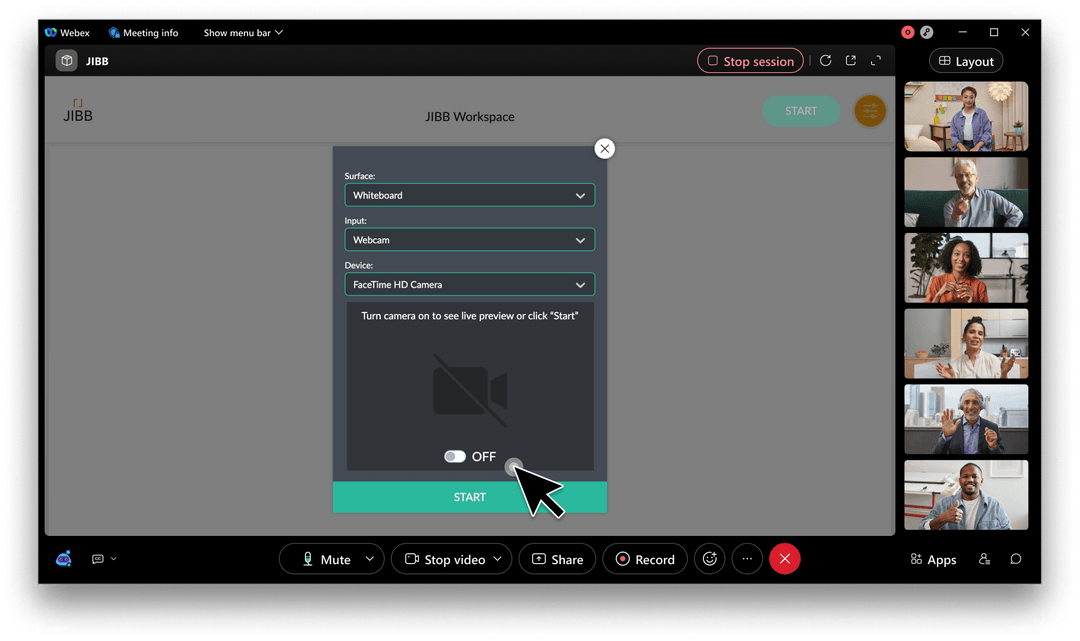
The first time you use JIBB, you’ll need to configure your desired writing surface and camera input before you can click start. Open the Control panel using the orange icon in the top right of the window.

First, set your surface by choosing between Whiteboard or Paper, based on what you’re planning to write on. Next, select the input (type of camera/device) you want JIBB to use to capture your writing.
You can choose between Mobile (the JIBB Connect mobile app available on iOS & Android), Webcam (4K cameras are recommended but not essential). Once your input/device is set up, you’re ready to click “Start” and share your writing.
